Vecte
"Fluffy"
- Joined
- Apr 7, 2008
- Messages
- 4,213
- Reaction score
- 0
Since there is not a detailed write-up of how to properly install the S2000 antenna on our X-Runners, I figured I would write one! This is a very simple process, and it can all be done in about 20 minutes if you have all of the proper tools. Below is a list of tools you will need to make this happen...
1. Small Crescent Wrench
2. Vice
3. Saw that will cut metal (I recommend a hand saw over a jigsaw, or other power saw. Reason being is you are working with small pieces that are easier to mess up with a power tool.)
4. Grinder or metal file.
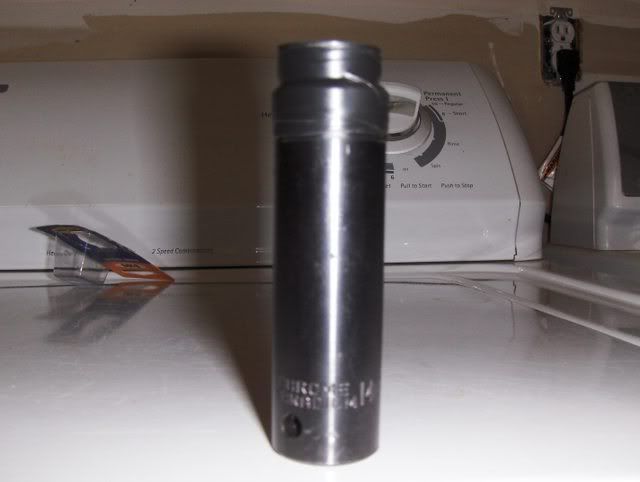
5. Deep socket and Electrical tape (I will explain:biggrin")
6. Drill with a 9/16s bit.
7. Red Loctite (This is the strongest grade of Loctite. To give you an idea, it has to be heated up to 350F for it to break down.)
Next are the rest of the items you will need for the Antenna install...
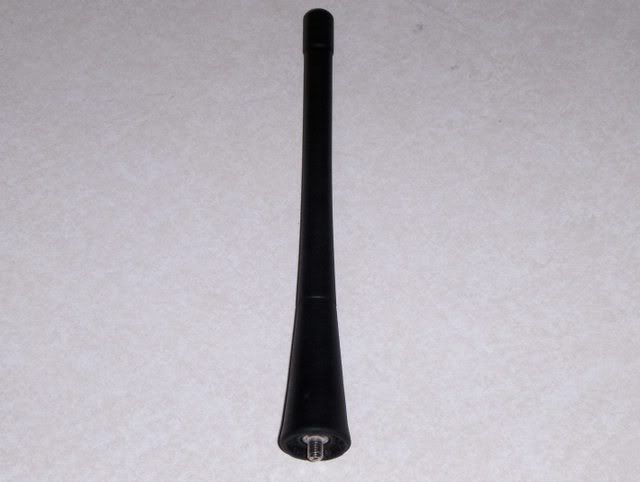
1. S2k(S2000) Antenna. You can get replica's of these off of ebay for around $10.00, you can get them in junkyard's or used Honda parts store, or pay the dealership $20-$30 for one.
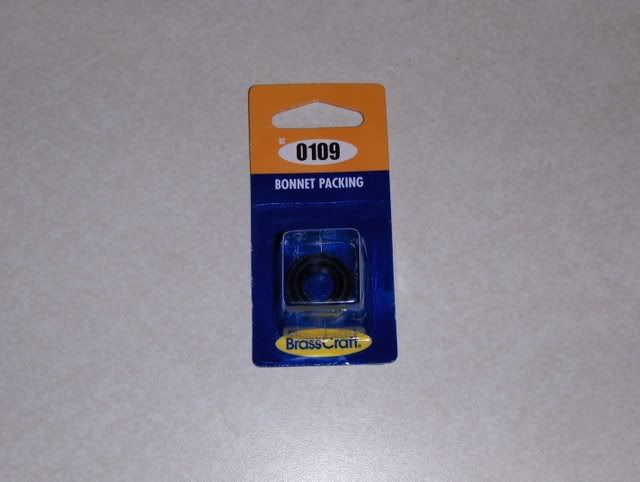
2. Bonnet Packing. You should be able to get Bonnet Packing from any hardware store, or store that has plumbing supplies. I used BrassCraft 0109 Bonnet Packing for this, and it worked excellent. You typically get two in a pack for around $1.50, so you will have a spare if you f*ck one up!
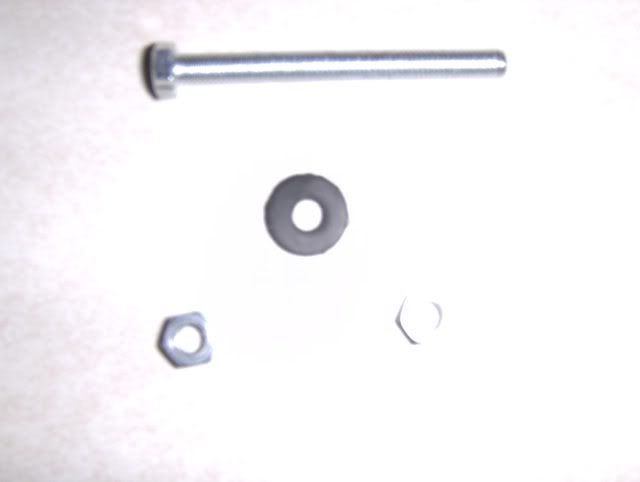
3. Three inch metric bolt the same size as antenna bolt, two nuts that fit the bolt, and two small rubber washers that fit over the bolt. If you are unsure of what size bolt, just bring the antenna in to the store with you, find a nut that fits it, then find a three inch bolt that fits the nut!
Once you have all of the tools and parts you will need for this, you are ready to begin. First step is Bonnet Packing. The particular Bonnet Packing I purchased fit flush with the base of the antenna. When looking at the Bonnet Packing, one side is cone-shaped and the other side is flat.
Cone-Shaped Side:
Flat Side:

The cone side is the side that goes into the base of the antenna, and the flat side goes to the base of the truck. The hole that is already in the Bonnet Packing is note quite large enough to fit over the silver base on our truck, so this is where there is a little modding required for it...
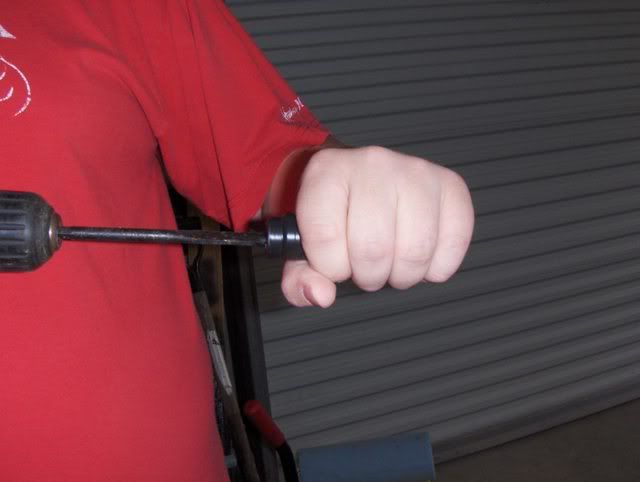
Take a deep socket that you would use for a ratchet or impact wrench, and place the cone side of the Bonnet Packing on it. It does not have to go into the socket, it just has to rest on top of it. Then use the electric tape, and tightly wrap it to the socket. It should look something like this:
Basically what you are doing is making something to hold on to, so you can drill into the Bonnet Packing. The rubber on these things is very tough, and it is kinda small to try and just hold in your hand yourself. After it is secured, find a drill bit that is about the same width as the silver base on our truck, and drill out the flat side of the Bonnet Packing:
(When drilling, do not apply much pressure. It is fairly easy to drill into the Bonnet Packing, and applying a lot of pressure could cause the drill to slip out. This method I used is by far not the best, and probably not the safest either. The reason I did it this way was because it was the only way I was able to drill it out at the time. If you have another way that is easier or safer, then definitely use it.)
NOTE: I have still not been able to figure out a better method of doing this. The Bonnet Packing is very flimsy, and it is hard to get something to hold it down without bending it. If someone else finds a better way that is easily accessible to others, please let me know so I can add it to this write-up!
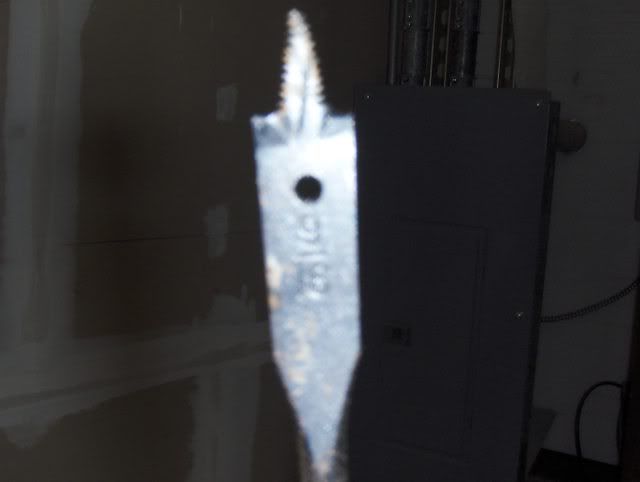
This is the drill bit that I used:
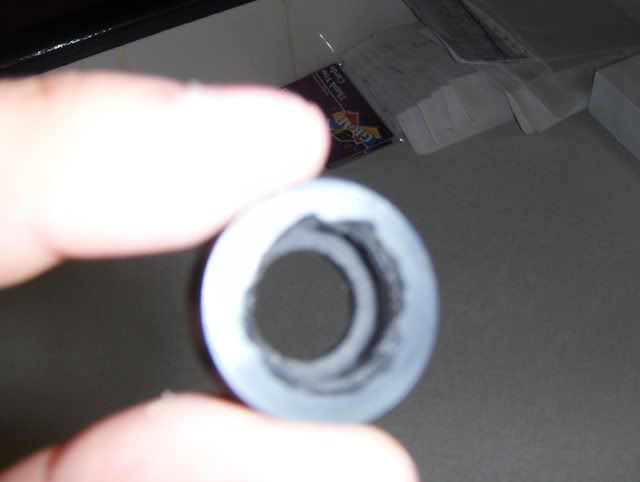
Here is the end result of mine once it was drilled:
Just make sure that the flat side of the Bonnet Packing will go over the silver base on the truck.
After you have fixed the Bonnet Packing, the next step is the antenna base. Take the S2k antenna, and screw one of the nuts you bought onto it until it touches the inside of the base of the antenna. You do not have to bear down on it once it has stopped, and you shouldn't bear down on it. It needs to be loose so you can take it back off easily once you are done. Here is how it should look:
A small piece of the bolt on the antenna is sticking out of the nut. Cut it off. Take a towel or something, and hold the antenna down to the edge of a table, and cut that excess piece of bolt off with your saw. Another option is to tightly wrap the antenna with the towel, and place it in a vice. If the towel is wrapped around the antenna a few times, the vice will clamp down without damaging the antenna:
If your saw is designed to cut metal, it shouldn't take much effort at all. Once you have cut the small excess piece off, unscrew the nut off of the antenna, this will fix the threads on the end of it. Next, take the cut edge and grind it flat on a grinder. If you don't have a grinder, use a metal file.
After you have cut the excess piece of bolt off the antenna, you need to trim up the 3" bolt you purchased. I took the same nut I used on the antenna, and screwed it all the way onto the 3" bolt. I then took the bolt, and screwed it into the antenna base on the truck. Once it was all the way in, I screwed the nut down the bolt until it was about an 1/8 of an inch from the base. I then used a permanent marker, and marked where the nut was:
(Since I first started doing this, I actually took measurements. You need to place a mark at an inch and 1/8 on the bolt, and cut on that. This should give you the correct length you need.)
Unscrew the bolt from the truck, and then unscrew the nut from the bolt. Take the bolt, and place the head of it tightly into a vice, then take your saw and cut right were you marked the bolt. Take the piece of bolt that you cut off, and thread the nut over to make sure the threads are okay. Next, take the cut edge of the bolt you will be using, and grind it flat with a grinder. Again, if you don't have a grinder, and metal file will do the job.
Once you have your piece of bolt, take the other nut you bought (the reason you got two is because the other one you used to cut with is likely damaged), and your piece of bolt you just cut. On the end of the piece of bolt where it was cut, gently put some Red Loctite onto the ends of the threads, and thread it about halfway into the fresh nut:
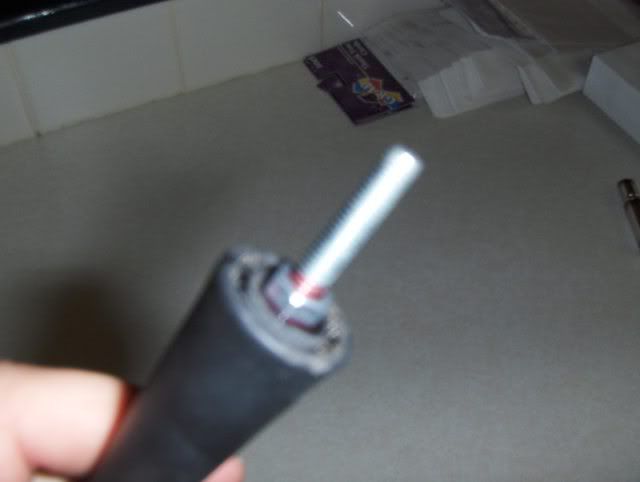
Then take the antenna, place the rubber washer all the way against it's base, then take Red Loctite and carefully place some around the exposed threading on the antenna. Now carefully take the other end of the nut that your piece of bolt is halfway screwed into, and screw it down onto the antenna. I used a small crescent wrench to tighten it down onto the antenna. After tightening it, make sure you cannot pull it apart with your hands. The finished product should look something like this:
You now need to allow the Loctite to cure. Loctite is pretty fast to dry, I waited about 20 minutes before I screwed it onto my truck. You can probably do good to wait as long as you want with the Loctite. Once you have felt you have waited long enough for the Loctite to dry, take the Bonnet Packing you bored out, place the cone-shaped side up against the base of the antenna, then slip the second rubber washer over the bolt up against the Bonnet Packing, and then screw the antenna down on to your truck. The reason for the Bonnet Packing is to hide the nut that is being used to hold the bolts together, and the reason for the second washer is so that when the antenna is tightened down, the nut you used to hold the bolts together doesn't tighten against the metal on the base of the truck.
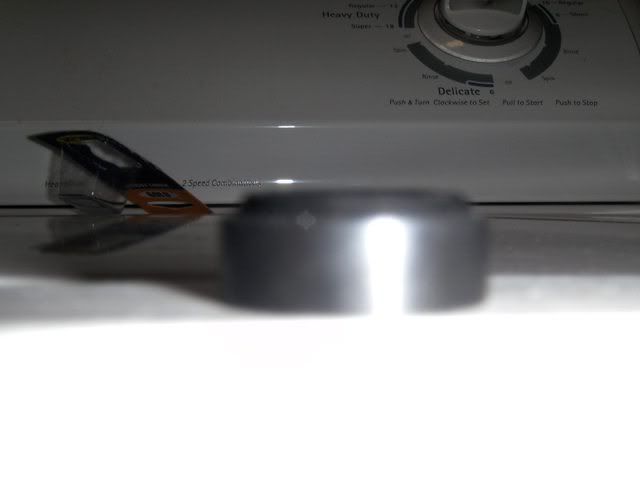
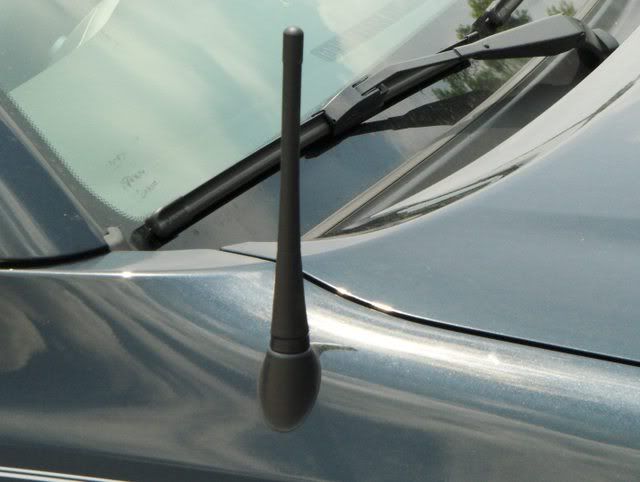
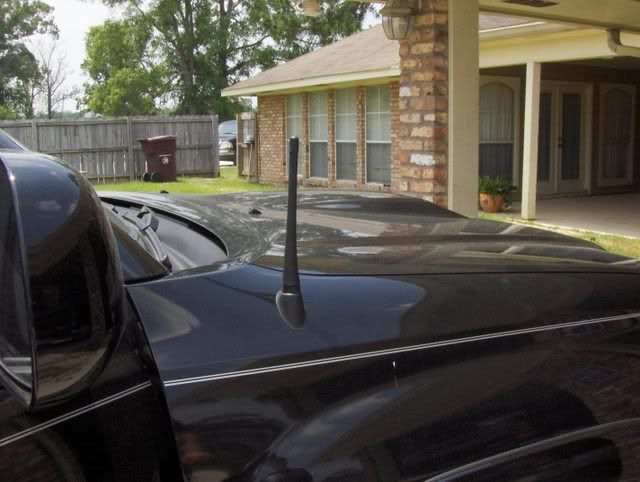
Here is the finished setup:
Sorry if some of the pictures aren't of the greatest of quality. I don't always have steady hands, and the camera I was using wasn't that good.
1. Small Crescent Wrench
2. Vice
3. Saw that will cut metal (I recommend a hand saw over a jigsaw, or other power saw. Reason being is you are working with small pieces that are easier to mess up with a power tool.)
4. Grinder or metal file.
5. Deep socket and Electrical tape (I will explain:biggrin
6. Drill with a 9/16s bit.
7. Red Loctite (This is the strongest grade of Loctite. To give you an idea, it has to be heated up to 350F for it to break down.)
Next are the rest of the items you will need for the Antenna install...
1. S2k(S2000) Antenna. You can get replica's of these off of ebay for around $10.00, you can get them in junkyard's or used Honda parts store, or pay the dealership $20-$30 for one.
2. Bonnet Packing. You should be able to get Bonnet Packing from any hardware store, or store that has plumbing supplies. I used BrassCraft 0109 Bonnet Packing for this, and it worked excellent. You typically get two in a pack for around $1.50, so you will have a spare if you f*ck one up!
3. Three inch metric bolt the same size as antenna bolt, two nuts that fit the bolt, and two small rubber washers that fit over the bolt. If you are unsure of what size bolt, just bring the antenna in to the store with you, find a nut that fits it, then find a three inch bolt that fits the nut!
Once you have all of the tools and parts you will need for this, you are ready to begin. First step is Bonnet Packing. The particular Bonnet Packing I purchased fit flush with the base of the antenna. When looking at the Bonnet Packing, one side is cone-shaped and the other side is flat.
Cone-Shaped Side:
Flat Side:
The cone side is the side that goes into the base of the antenna, and the flat side goes to the base of the truck. The hole that is already in the Bonnet Packing is note quite large enough to fit over the silver base on our truck, so this is where there is a little modding required for it...
Take a deep socket that you would use for a ratchet or impact wrench, and place the cone side of the Bonnet Packing on it. It does not have to go into the socket, it just has to rest on top of it. Then use the electric tape, and tightly wrap it to the socket. It should look something like this:
Basically what you are doing is making something to hold on to, so you can drill into the Bonnet Packing. The rubber on these things is very tough, and it is kinda small to try and just hold in your hand yourself. After it is secured, find a drill bit that is about the same width as the silver base on our truck, and drill out the flat side of the Bonnet Packing:
(When drilling, do not apply much pressure. It is fairly easy to drill into the Bonnet Packing, and applying a lot of pressure could cause the drill to slip out. This method I used is by far not the best, and probably not the safest either. The reason I did it this way was because it was the only way I was able to drill it out at the time. If you have another way that is easier or safer, then definitely use it.)
NOTE: I have still not been able to figure out a better method of doing this. The Bonnet Packing is very flimsy, and it is hard to get something to hold it down without bending it. If someone else finds a better way that is easily accessible to others, please let me know so I can add it to this write-up!
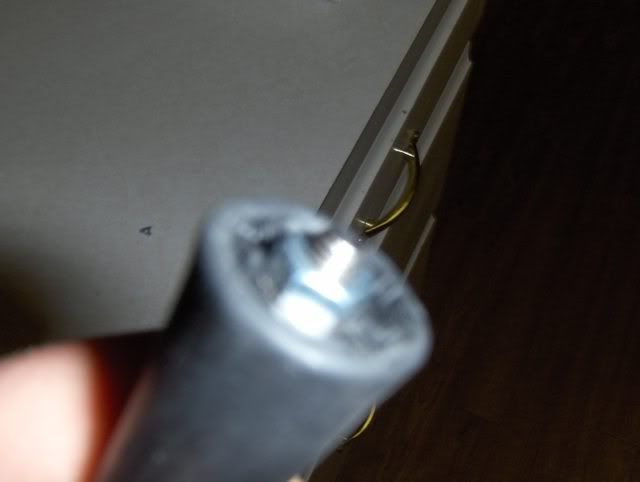
This is the drill bit that I used:
Here is the end result of mine once it was drilled:
Just make sure that the flat side of the Bonnet Packing will go over the silver base on the truck.
After you have fixed the Bonnet Packing, the next step is the antenna base. Take the S2k antenna, and screw one of the nuts you bought onto it until it touches the inside of the base of the antenna. You do not have to bear down on it once it has stopped, and you shouldn't bear down on it. It needs to be loose so you can take it back off easily once you are done. Here is how it should look:
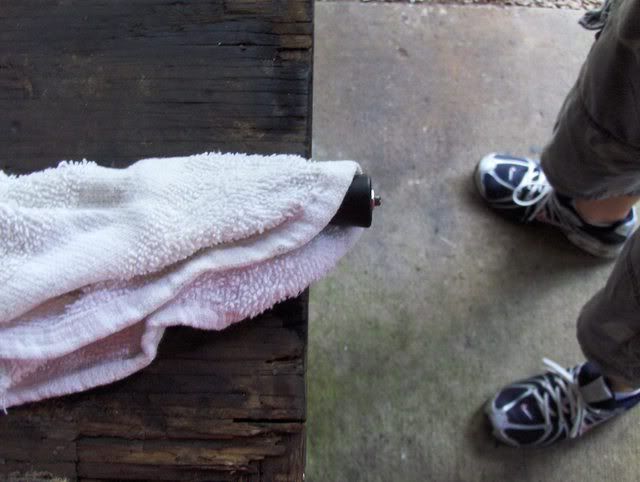
A small piece of the bolt on the antenna is sticking out of the nut. Cut it off. Take a towel or something, and hold the antenna down to the edge of a table, and cut that excess piece of bolt off with your saw. Another option is to tightly wrap the antenna with the towel, and place it in a vice. If the towel is wrapped around the antenna a few times, the vice will clamp down without damaging the antenna:
If your saw is designed to cut metal, it shouldn't take much effort at all. Once you have cut the small excess piece off, unscrew the nut off of the antenna, this will fix the threads on the end of it. Next, take the cut edge and grind it flat on a grinder. If you don't have a grinder, use a metal file.
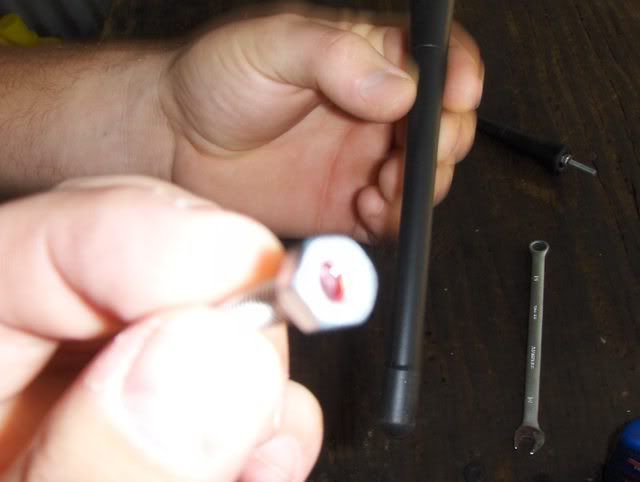
After you have cut the excess piece of bolt off the antenna, you need to trim up the 3" bolt you purchased. I took the same nut I used on the antenna, and screwed it all the way onto the 3" bolt. I then took the bolt, and screwed it into the antenna base on the truck. Once it was all the way in, I screwed the nut down the bolt until it was about an 1/8 of an inch from the base. I then used a permanent marker, and marked where the nut was:
(Since I first started doing this, I actually took measurements. You need to place a mark at an inch and 1/8 on the bolt, and cut on that. This should give you the correct length you need.)
Unscrew the bolt from the truck, and then unscrew the nut from the bolt. Take the bolt, and place the head of it tightly into a vice, then take your saw and cut right were you marked the bolt. Take the piece of bolt that you cut off, and thread the nut over to make sure the threads are okay. Next, take the cut edge of the bolt you will be using, and grind it flat with a grinder. Again, if you don't have a grinder, and metal file will do the job.
Once you have your piece of bolt, take the other nut you bought (the reason you got two is because the other one you used to cut with is likely damaged), and your piece of bolt you just cut. On the end of the piece of bolt where it was cut, gently put some Red Loctite onto the ends of the threads, and thread it about halfway into the fresh nut:
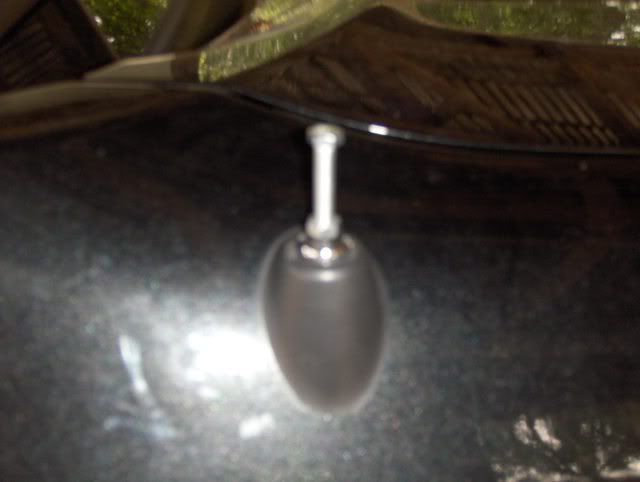
Then take the antenna, place the rubber washer all the way against it's base, then take Red Loctite and carefully place some around the exposed threading on the antenna. Now carefully take the other end of the nut that your piece of bolt is halfway screwed into, and screw it down onto the antenna. I used a small crescent wrench to tighten it down onto the antenna. After tightening it, make sure you cannot pull it apart with your hands. The finished product should look something like this:
You now need to allow the Loctite to cure. Loctite is pretty fast to dry, I waited about 20 minutes before I screwed it onto my truck. You can probably do good to wait as long as you want with the Loctite. Once you have felt you have waited long enough for the Loctite to dry, take the Bonnet Packing you bored out, place the cone-shaped side up against the base of the antenna, then slip the second rubber washer over the bolt up against the Bonnet Packing, and then screw the antenna down on to your truck. The reason for the Bonnet Packing is to hide the nut that is being used to hold the bolts together, and the reason for the second washer is so that when the antenna is tightened down, the nut you used to hold the bolts together doesn't tighten against the metal on the base of the truck.
Here is the finished setup:
Sorry if some of the pictures aren't of the greatest of quality. I don't always have steady hands, and the camera I was using wasn't that good.
Last edited: