Vince77
New Member
- Joined
- Feb 22, 2008
- Messages
- 4,020
- Reaction score
- 0
What you'll need.
-Dremel or rotory tool of somekind, with cut off wheel, regular or diamond disk will work, and sanding drum.
-Knife or flat head screw driver.
-Painters tape.
-Xacto or somekind of small sharp knife
-Plastic fusion black paint. Whatever finish you choose.
-Somekind of plastic glue, Edit: Use some type of two part epoxy. Super glue fumes bring out any little finger print that might be left inside lens.
-Silicone.
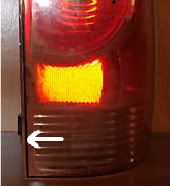
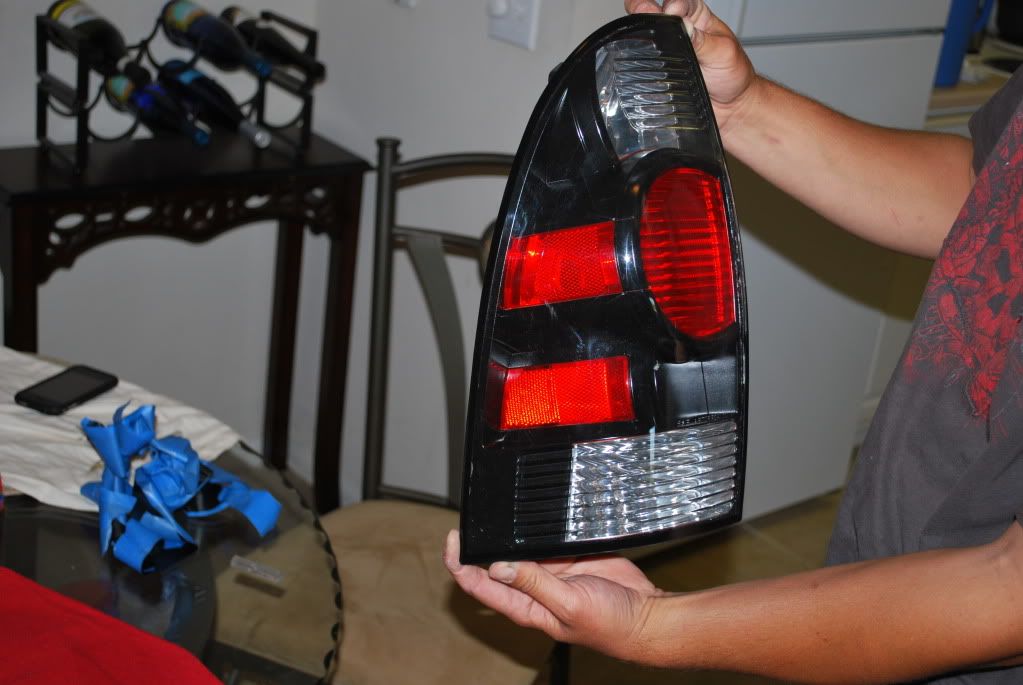
First you start by cutting along the groove between the clear lens and the black backing of the tail light. Careful to stay in the groove as much as you can. And move slowly, the regular cheap cutting wheels will shatter easily, but cut a little easier also.
You only need to cut as deep as the black line you can see on the face of the tail lens.
Once you have cut all the way around the lens, you'll have to use a knife or flat head screw driver to pop the lens the rest of the way off. Some of the plastic will stick back together. Do a little bit at a time so you do not crack the lens.
With lens off.
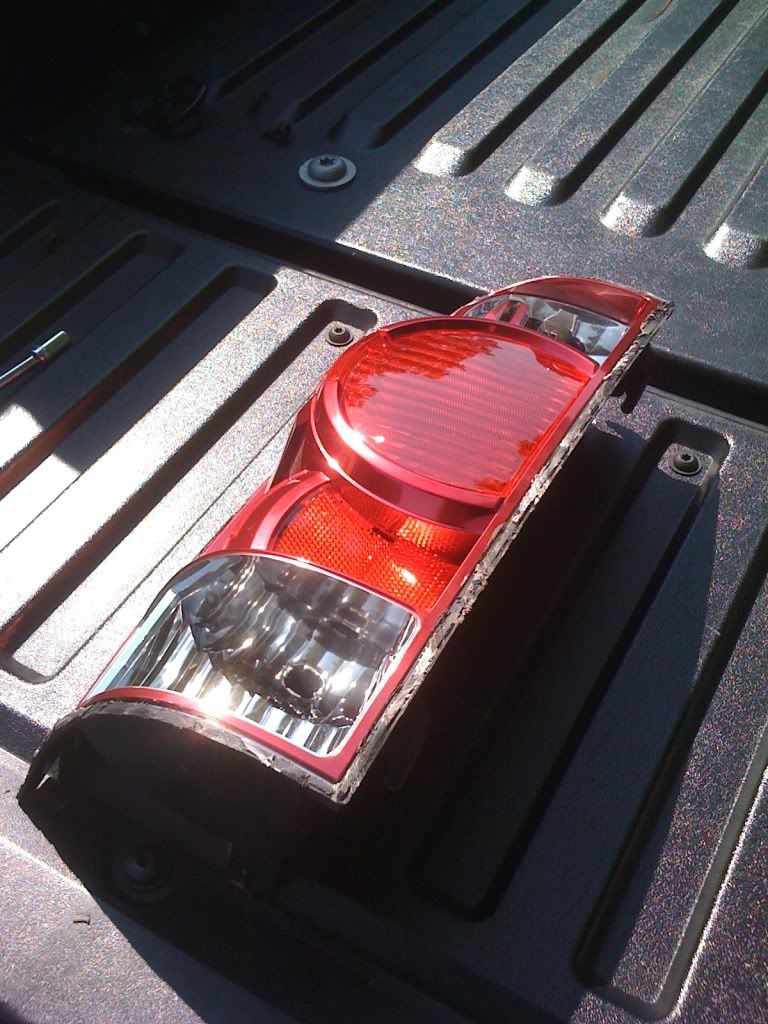
Now you need to sand and smooth down the edges where the lens and tail light will come back together.
Next tape of the areas you don't want to paint. Use the xacto knife to make your clean edges. We taped off the one side reflector but painted over the rear facing one.
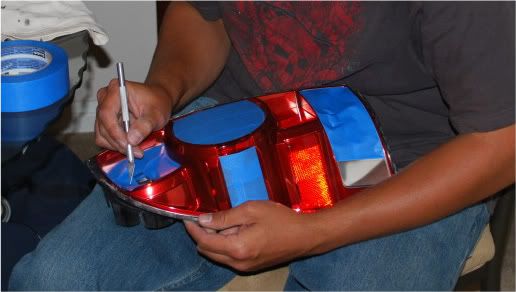
Next, clean and paint the tail light. Let dry and remove tape.
Make sure to clean both the inside of the lens, and tail light before putting them back together.
You can either tape them or have someone hold the lens onto the tail while gluing them back together.
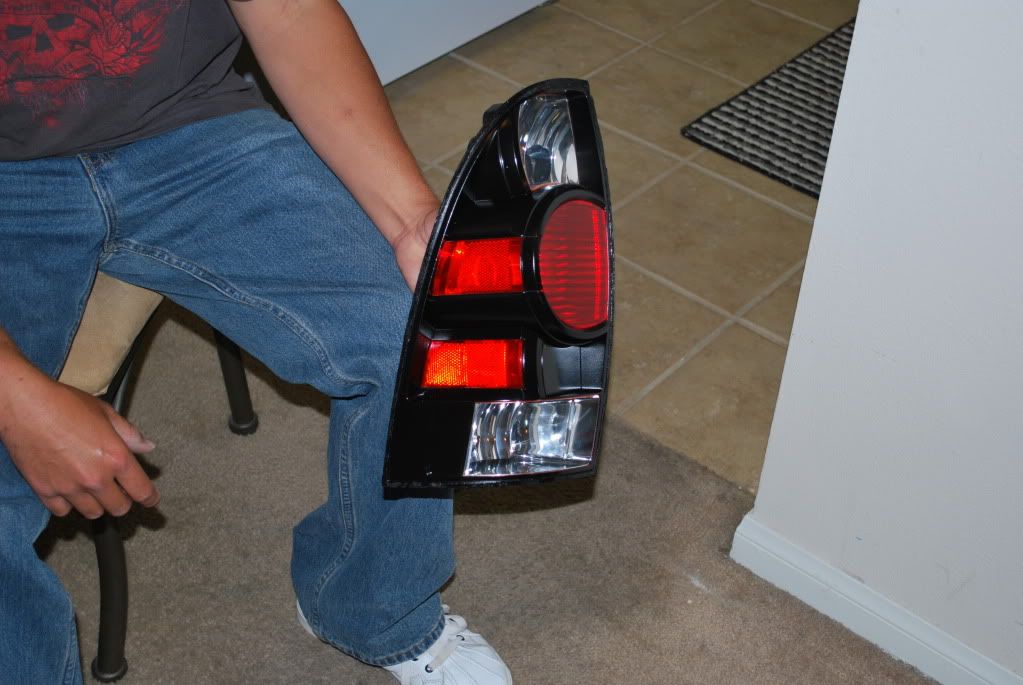
Once lens is glued back on, run a small bead of silicone along the seam of the tail light and lens. Run your finger along the seam to push it in some, and clean up any extra.
After the silicone has dried, tape off all but about a 1/4" of the edge of the lens. You'll need to paint a small portion of the edge to hide where the seam was cut.
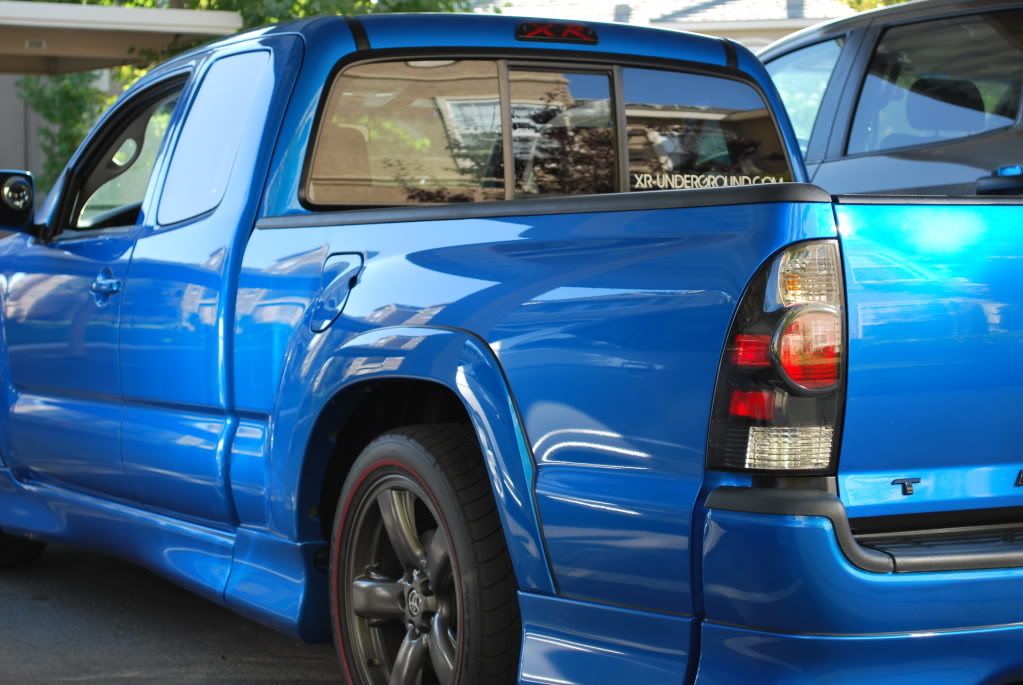
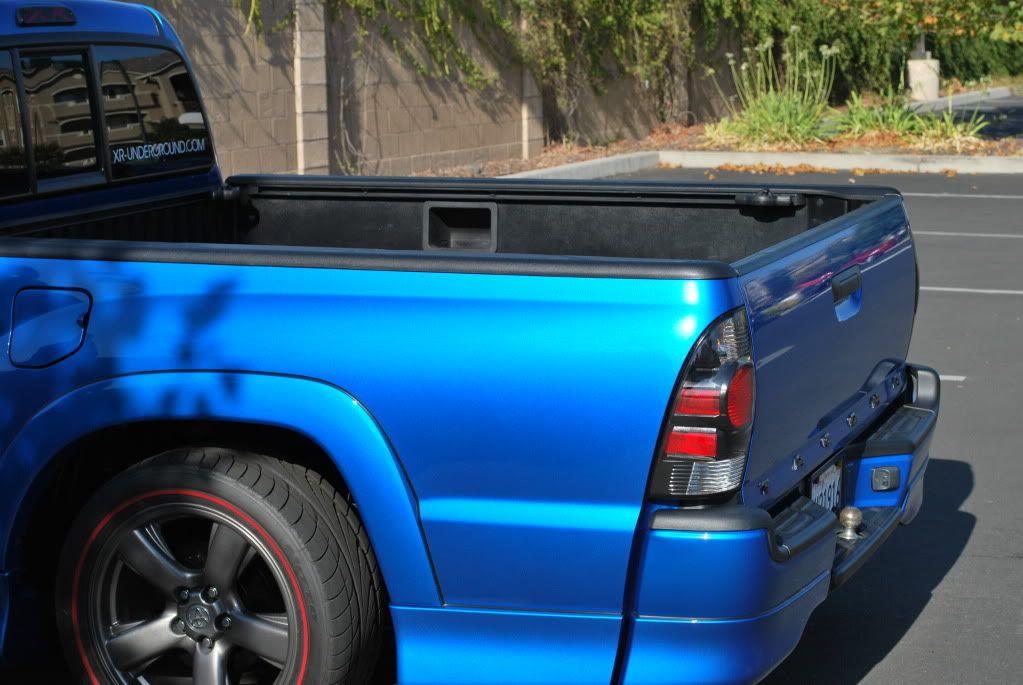
Let paint dry, remove the tape and your done.
-Dremel or rotory tool of somekind, with cut off wheel, regular or diamond disk will work, and sanding drum.
-Knife or flat head screw driver.
-Painters tape.
-Xacto or somekind of small sharp knife
-Plastic fusion black paint. Whatever finish you choose.
-Somekind of plastic glue, Edit: Use some type of two part epoxy. Super glue fumes bring out any little finger print that might be left inside lens.
-Silicone.
First you start by cutting along the groove between the clear lens and the black backing of the tail light. Careful to stay in the groove as much as you can. And move slowly, the regular cheap cutting wheels will shatter easily, but cut a little easier also.
You only need to cut as deep as the black line you can see on the face of the tail lens.
Once you have cut all the way around the lens, you'll have to use a knife or flat head screw driver to pop the lens the rest of the way off. Some of the plastic will stick back together. Do a little bit at a time so you do not crack the lens.
With lens off.
Now you need to sand and smooth down the edges where the lens and tail light will come back together.
Next tape of the areas you don't want to paint. Use the xacto knife to make your clean edges. We taped off the one side reflector but painted over the rear facing one.
Next, clean and paint the tail light. Let dry and remove tape.
Make sure to clean both the inside of the lens, and tail light before putting them back together.
You can either tape them or have someone hold the lens onto the tail while gluing them back together.
Once lens is glued back on, run a small bead of silicone along the seam of the tail light and lens. Run your finger along the seam to push it in some, and clean up any extra.
After the silicone has dried, tape off all but about a 1/4" of the edge of the lens. You'll need to paint a small portion of the edge to hide where the seam was cut.
Let paint dry, remove the tape and your done.
Last edited: