xtoplinex
New Member
- Joined
- Jan 15, 2007
- Messages
- 1,850
- Reaction score
- 0
This is from Matthew on Showtruckscene.com.Sorry that I couldn't help you guys out..:frown: ..but with this, you will be able to do it yourself..and without a gun and candy paint.:top:...BUT I HIGHLY RECOMMEND AUTOMOTIVE CLEARCOAT AT LEAST!!!!
Ok, so I candied my tailights and thought it would be beneficial to all the members if a how two article was put together so others won't have to ask everyone how to do it every other week. I do not claim to be a pro painter but if you follow my instructions and have some ability to wet sand you will end up with a nice looking light for a relatively small amount of money invested. Others may have differing opinions on how to do this so get a second opinion if you don't like my instructions. I make no money back guarantee on the directions so follow at your own risk. If you screw up your lights it's not on me ok Oh yeah I am very detail oriented (pretty much anal) so this thread is incredibly long.
1. Supplies-
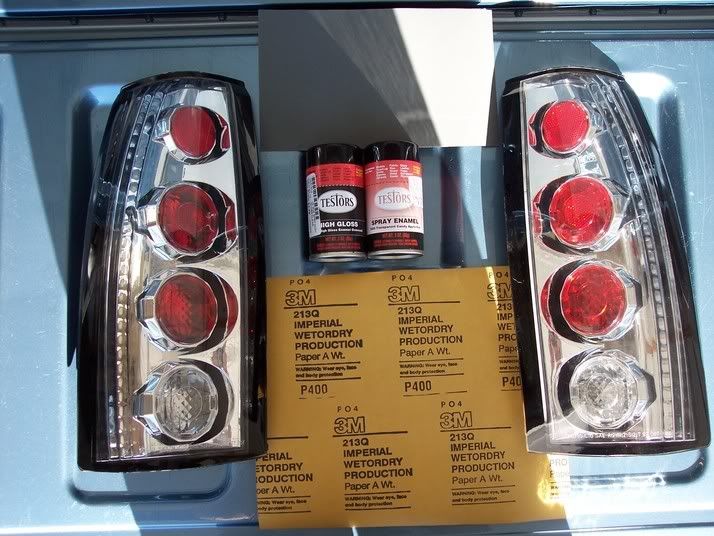
You will need a handfull of supplies to complete this project.
One can of Testors Transparent Candy Apple Red #1605 paint-found at hobby shops.
One can of Testors Gloss Clear coat #1814 paint-optional either Testors clear or Automotive clear, I have heard differing stories as to what works best I used Testors clear in my case.
Wet/Dry sandpaper you need 400 grit, 600 grit, 1500 grit and 2000 grit.-available at many autopart stores or paint supply stores.
Foam sanding pad- available at automotive paint stores, or your local body shop (you wrap the sand paper around the pad while wet sanding)
Polish-you can use 3M polish, Meguiars swirl remover #9 or Meguiars Cleaner Wax. I tried all three and got the same results. Do not use rubbing compound it is too abrasive and will wear the paint down to much.
You will also need rags, a bucket with water, liquid dish soap. Also don't plan on doing this project in one day, it will take a few days to slowly complete the process and have a nice end result.
2. The process-
A. Remove tailights, you should be able to figure this out on your own.
B. Wash tailights with liquid dish soap and water, use soap that cuts grease.
C. Dry lights.
D. Take your 400 grit sand paper and dry sand the lights. You are scuffing them up so paint will stick to them. They will look cloudly and you might think you have ruined them after you finish sanding, don't worry they will be fine, paint will fill in the scratch marks. See picture below.
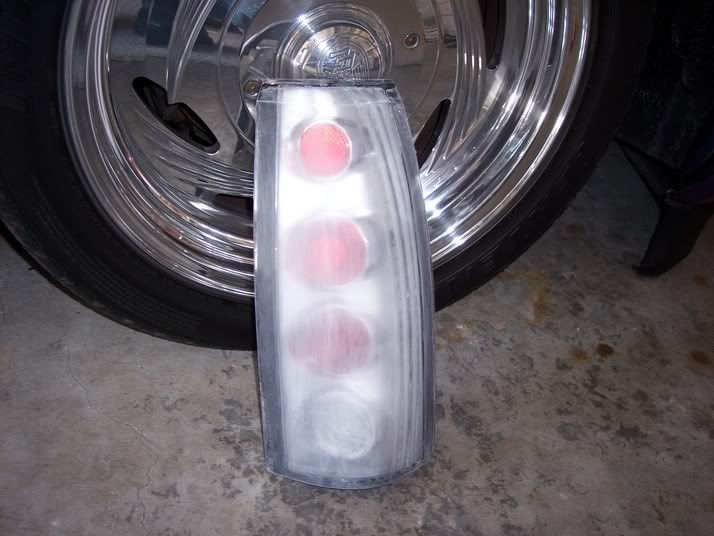
E. Wipe off your freshly sanded lenses with a dry clean rag or towel. No greasy ones please, paint won't stick to grease, also try not to touch the lense with your finger tips (fingers contain dirt and oil residue), hold them by the back of the light.
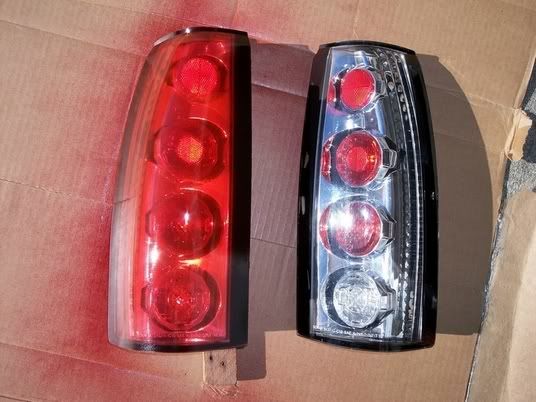
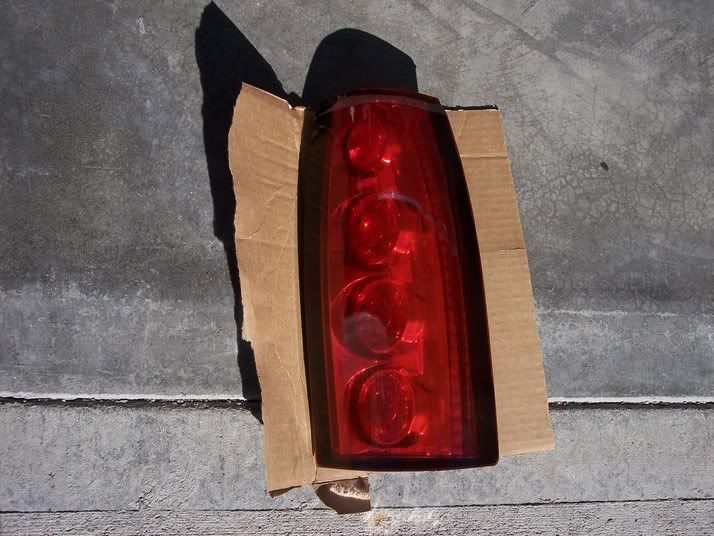
F. Paint lights with the Testor's Candy Apple Red. First coat is a light coat, hold can about 10" away from lights use even strokes and continue to spray past the light don't stop midway through a stroke or you will create runs.
Picture below is after one coat compared to original light.
G. Let paint tack up a good 30 minutes between coats, not giving enough time between coats increases the likely hood of runs, which nobody likes the runs :crap: Now I gave each light 4 coats of Candy, depending on the shade of red you like you may want less or you may want more than that. 3 coats seems to be the standard practice among members.
H. Let lights dry 24 hours, some say longer, 24 worked fine for me.
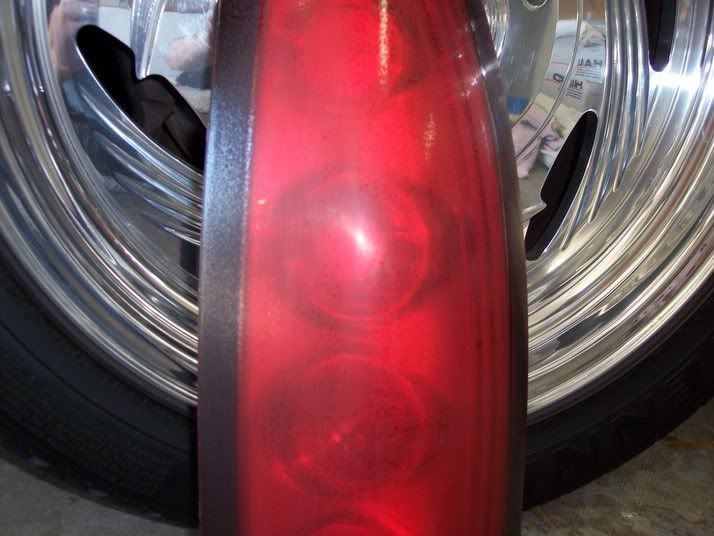
I. Wet sand lights with 400 grit paper, you don't need to bear down on the lights you are just taking off the grit (dust, etc.) that has gotten trapped in the paint while drying. This process also smooths the "orange peel" look you have going on at the present time. Note: Use extreme caution around corners or the edges of the light to prevent sanding through. After using the 400 grit the light will look cloudy again, no need to be alarmed. :flame: Cause now your going to use 600 and take a little more off by wet sanding and smoothing even further. Dry the lights off periodically to see how much orange peel you have left to go and where you need to concentrate your efforts. One point I would like to emphasize here is lightly sanding and taking little bits off at a time, you don't want to sand through the paint. The term "Less is More" applies here. Try to get rid of as much "orange peel" look as you can on the light. Light should look cloudy and dull. I didn't even get all the "peel" out at this stage. If you see mine at end of article and like the results you should be ok too. Here is a pic of the "cloudy stage" look. If you ever wet sanded a vehicle that's the look you are going for (the before the polished look) Another way to describe it would be they will look "flat" like primer.
J. Ok so now you have these cloudly smooth red tails, next apply your clear coat, either the testors or automotive style. As before, you want to do light coats and spray the entire length of the light (don't stop in the middle), paint can approx 10" away from light. I also did 4 coats of clear, the more clear you apply the more room you have to work with while wet sanding in the next step.
K. Let lights dry 24 hours again. I know you're impatient and want to be done but good things come to those who wait.
L. Ahhh time to wet sand again, get out your bucket, water and sanding pad along with 1500 grit and 2000 grit sandpaper. Now some might think this is over kill with such a high grit, but if you want your lights smooth as glass and shiney as a sunburnt ass then this is the final key step for you. :worship:
Take the 1500 and wet sand smoothing the light and reducing the orange peel. You will have to dry the lights periodically to see how much orange peel you have left. Once you have reduced most of the "peel" slap on the 2000 grit and finish it off. Ending result again is a cloudy, dull, peel free finish.
M. Last step, polish up the lights with your choice of the above mentioned polishes. I personally liked the Meguiars Cleaner Wax the best.
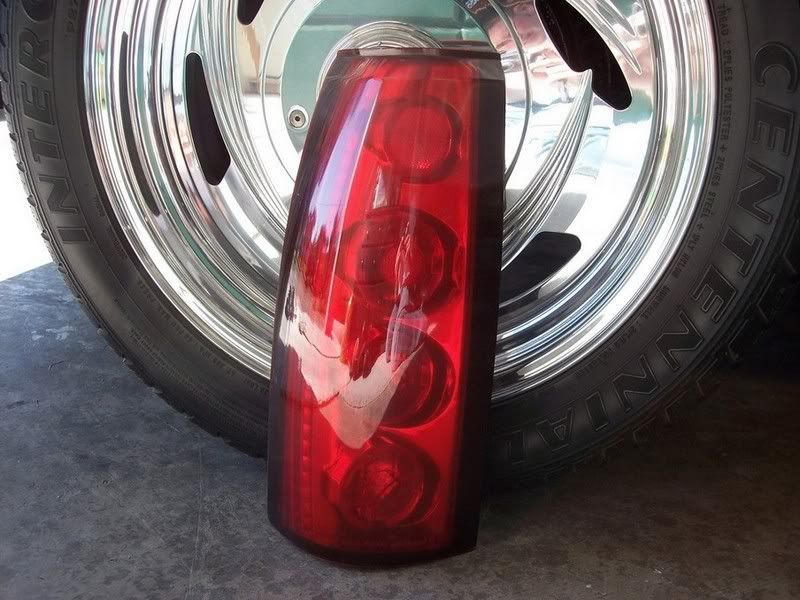
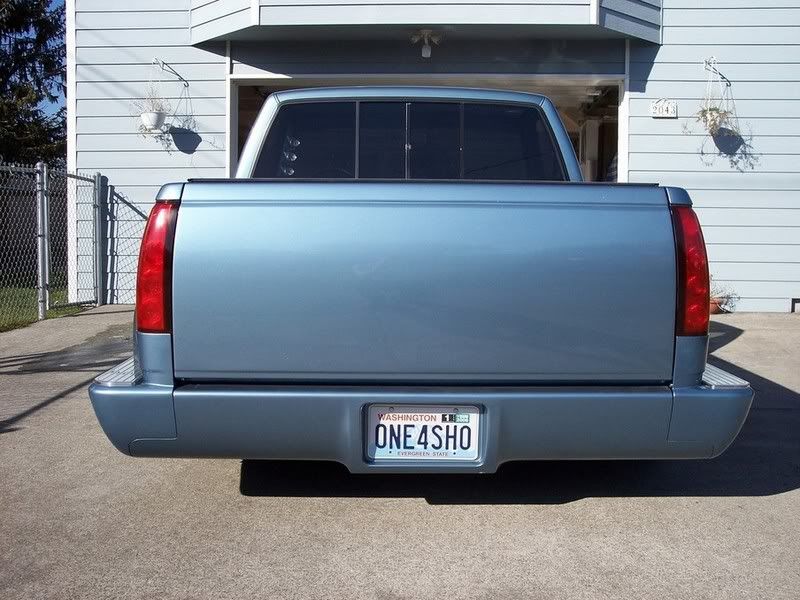
There you have it, nice candy tail lights that your friends will say "Damn".
Questions, comments or concerns PM me. Special Thanks to Y2KSerria and Bcubed for there advice while I completed this project.
:word:
Matt
Pics of finished project.

Ok, so I candied my tailights and thought it would be beneficial to all the members if a how two article was put together so others won't have to ask everyone how to do it every other week. I do not claim to be a pro painter but if you follow my instructions and have some ability to wet sand you will end up with a nice looking light for a relatively small amount of money invested. Others may have differing opinions on how to do this so get a second opinion if you don't like my instructions. I make no money back guarantee on the directions so follow at your own risk. If you screw up your lights it's not on me ok Oh yeah I am very detail oriented (pretty much anal) so this thread is incredibly long.
1. Supplies-
You will need a handfull of supplies to complete this project.
One can of Testors Transparent Candy Apple Red #1605 paint-found at hobby shops.
One can of Testors Gloss Clear coat #1814 paint-optional either Testors clear or Automotive clear, I have heard differing stories as to what works best I used Testors clear in my case.
Wet/Dry sandpaper you need 400 grit, 600 grit, 1500 grit and 2000 grit.-available at many autopart stores or paint supply stores.
Foam sanding pad- available at automotive paint stores, or your local body shop (you wrap the sand paper around the pad while wet sanding)
Polish-you can use 3M polish, Meguiars swirl remover #9 or Meguiars Cleaner Wax. I tried all three and got the same results. Do not use rubbing compound it is too abrasive and will wear the paint down to much.
You will also need rags, a bucket with water, liquid dish soap. Also don't plan on doing this project in one day, it will take a few days to slowly complete the process and have a nice end result.
2. The process-
A. Remove tailights, you should be able to figure this out on your own.
B. Wash tailights with liquid dish soap and water, use soap that cuts grease.
C. Dry lights.
D. Take your 400 grit sand paper and dry sand the lights. You are scuffing them up so paint will stick to them. They will look cloudly and you might think you have ruined them after you finish sanding, don't worry they will be fine, paint will fill in the scratch marks. See picture below.
E. Wipe off your freshly sanded lenses with a dry clean rag or towel. No greasy ones please, paint won't stick to grease, also try not to touch the lense with your finger tips (fingers contain dirt and oil residue), hold them by the back of the light.
F. Paint lights with the Testor's Candy Apple Red. First coat is a light coat, hold can about 10" away from lights use even strokes and continue to spray past the light don't stop midway through a stroke or you will create runs.
Picture below is after one coat compared to original light.
G. Let paint tack up a good 30 minutes between coats, not giving enough time between coats increases the likely hood of runs, which nobody likes the runs :crap: Now I gave each light 4 coats of Candy, depending on the shade of red you like you may want less or you may want more than that. 3 coats seems to be the standard practice among members.
H. Let lights dry 24 hours, some say longer, 24 worked fine for me.
I. Wet sand lights with 400 grit paper, you don't need to bear down on the lights you are just taking off the grit (dust, etc.) that has gotten trapped in the paint while drying. This process also smooths the "orange peel" look you have going on at the present time. Note: Use extreme caution around corners or the edges of the light to prevent sanding through. After using the 400 grit the light will look cloudy again, no need to be alarmed. :flame: Cause now your going to use 600 and take a little more off by wet sanding and smoothing even further. Dry the lights off periodically to see how much orange peel you have left to go and where you need to concentrate your efforts. One point I would like to emphasize here is lightly sanding and taking little bits off at a time, you don't want to sand through the paint. The term "Less is More" applies here. Try to get rid of as much "orange peel" look as you can on the light. Light should look cloudy and dull. I didn't even get all the "peel" out at this stage. If you see mine at end of article and like the results you should be ok too. Here is a pic of the "cloudy stage" look. If you ever wet sanded a vehicle that's the look you are going for (the before the polished look) Another way to describe it would be they will look "flat" like primer.
J. Ok so now you have these cloudly smooth red tails, next apply your clear coat, either the testors or automotive style. As before, you want to do light coats and spray the entire length of the light (don't stop in the middle), paint can approx 10" away from light. I also did 4 coats of clear, the more clear you apply the more room you have to work with while wet sanding in the next step.
K. Let lights dry 24 hours again. I know you're impatient and want to be done but good things come to those who wait.
L. Ahhh time to wet sand again, get out your bucket, water and sanding pad along with 1500 grit and 2000 grit sandpaper. Now some might think this is over kill with such a high grit, but if you want your lights smooth as glass and shiney as a sunburnt ass then this is the final key step for you. :worship:
Take the 1500 and wet sand smoothing the light and reducing the orange peel. You will have to dry the lights periodically to see how much orange peel you have left. Once you have reduced most of the "peel" slap on the 2000 grit and finish it off. Ending result again is a cloudy, dull, peel free finish.
M. Last step, polish up the lights with your choice of the above mentioned polishes. I personally liked the Meguiars Cleaner Wax the best.
There you have it, nice candy tail lights that your friends will say "Damn".
Questions, comments or concerns PM me. Special Thanks to Y2KSerria and Bcubed for there advice while I completed this project.
:word:
Matt
Pics of finished project.