Coupe
Active Member
- Joined
- Dec 31, 2007
- Messages
- 6,871
- Reaction score
- 15
Coupe Shifter Mod
There have been a few write ups on cutting down factory shifters. The inspiration for this mod is Stevenredx write up. This is his write up:
http://www.xr-underground.com/vb3/showthread.php?t=4549
The stock shifter has an internal rubber bushing. This bushing is prone to failure. When it wears out the shifter becomes very sloppy. Even when new, the shifter is a little “mushy”. This rubber bushing has one important feature “it isolates transmission vibration from the cab”.
If you make a solid mount shifter ( i.e. remove the bushing and weld it together) the transmission will transmit some noise to the cab. You may find this annoying.
This write up deals with two features:
While this write up addresses the factory shifter, it can also be done to the TRD SS shifter. The TRD shifter has this same rubber bushing. The TRD SS is about 1 ½” shorter than the stock shifter. I have also done a 4 wheel drive shifter. This is LONGER than the X-Runner shifter. The 4 wheel drive is ½” longer than the X-Runner.
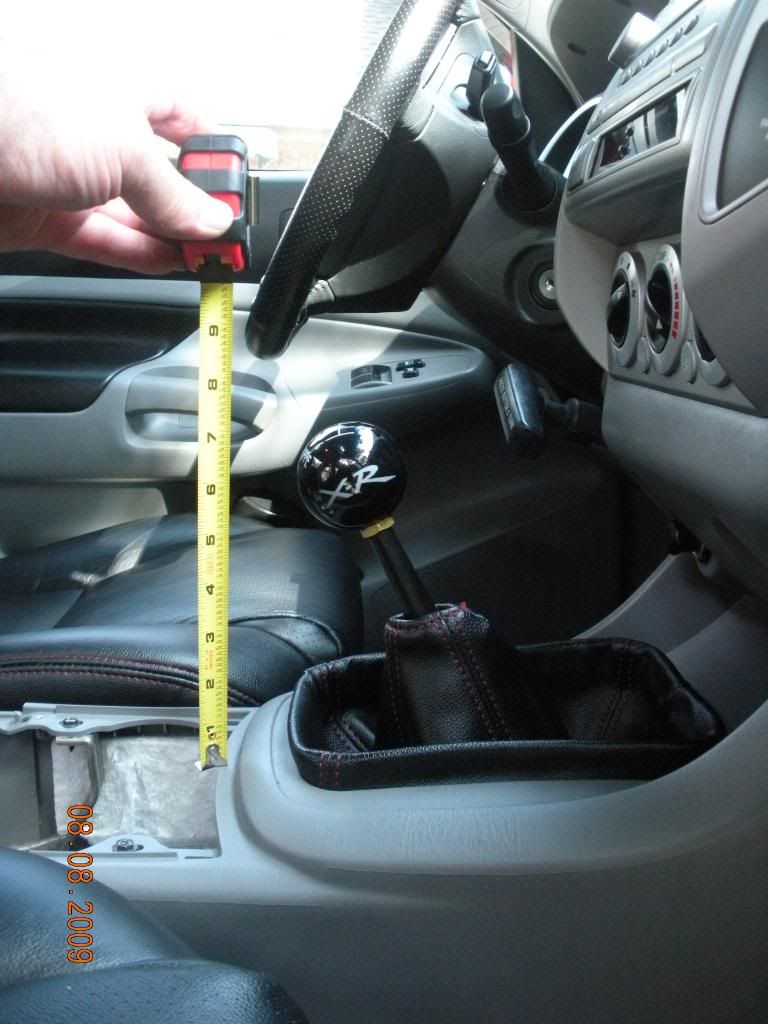
I have found it difficult to find a good reference point for measuring the shifter. I prefer to use the bend in the lower part of the shifter. I call this the knuckle. See Figure 1.
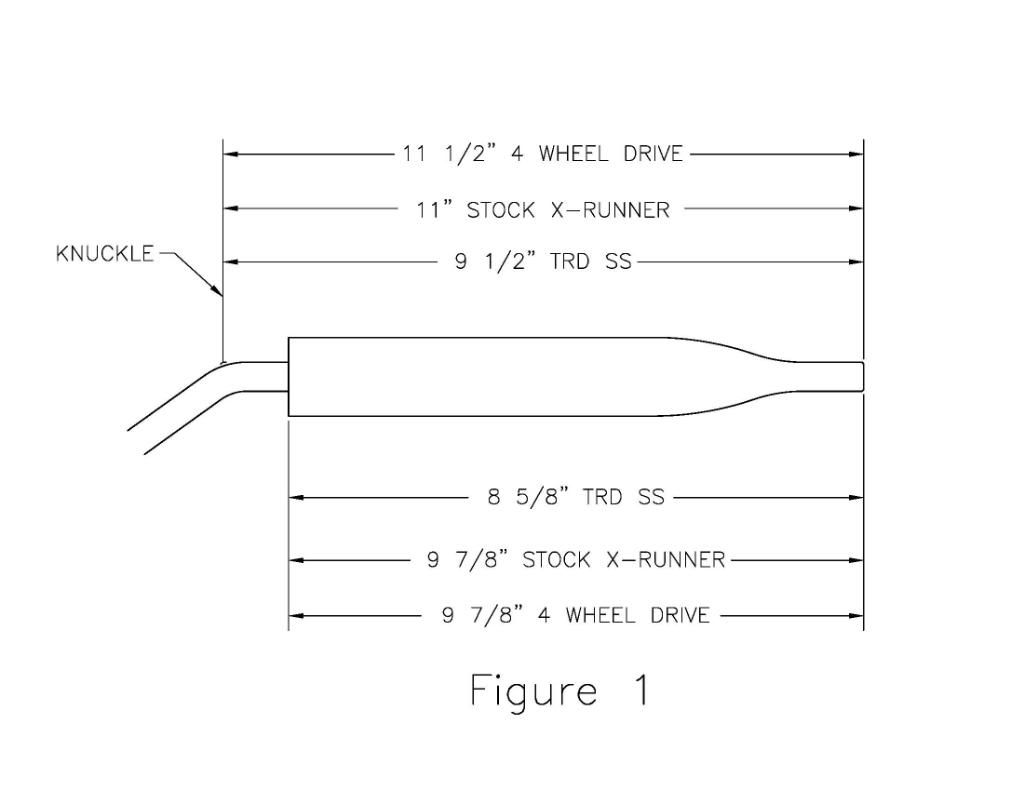
This figure shows the length dimensions of the different shifters.
If you have never pulled the shifter out, refer to the URD SS install instructions. These are excellent. It will show you how to pull the console and boot out.
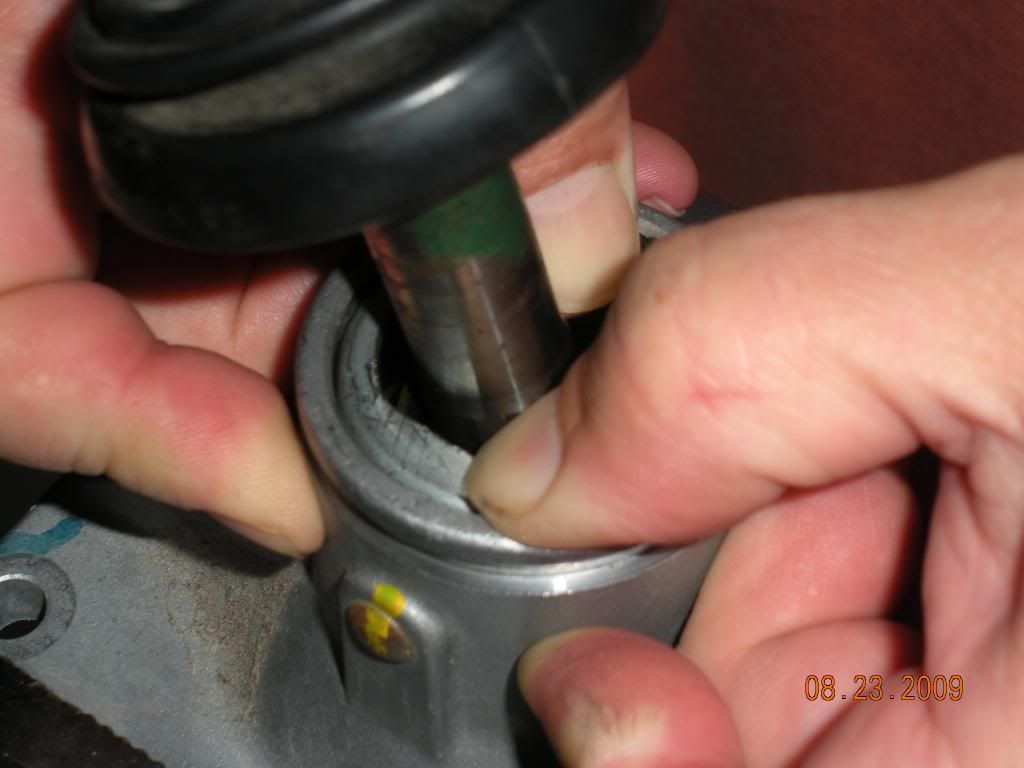
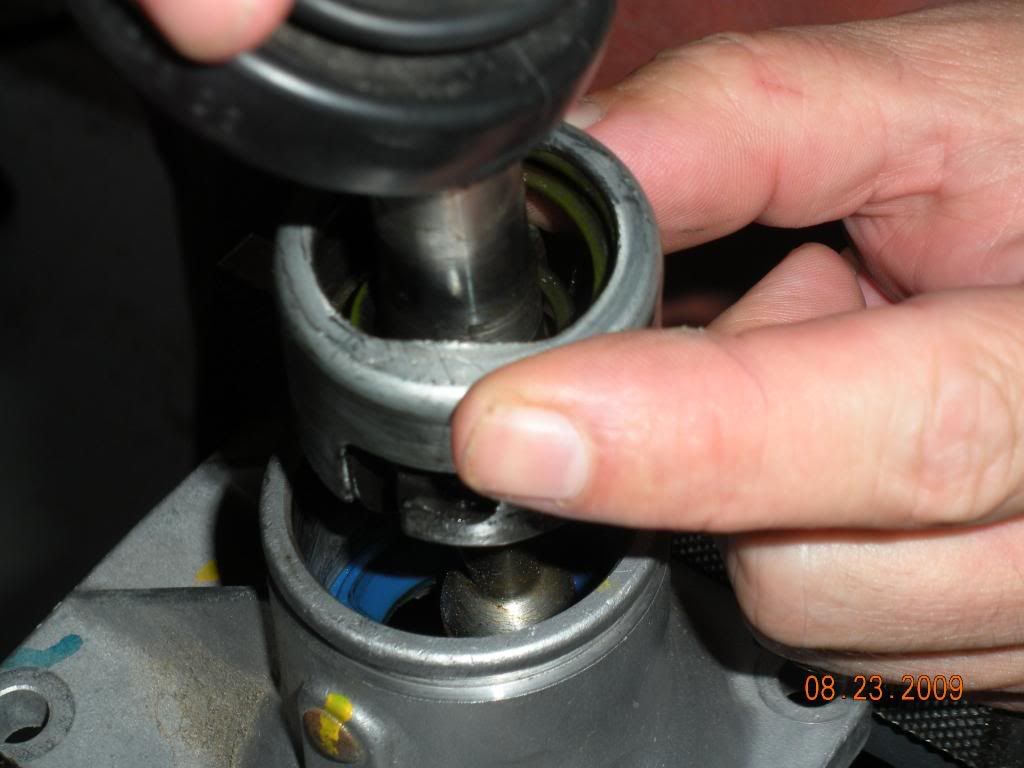
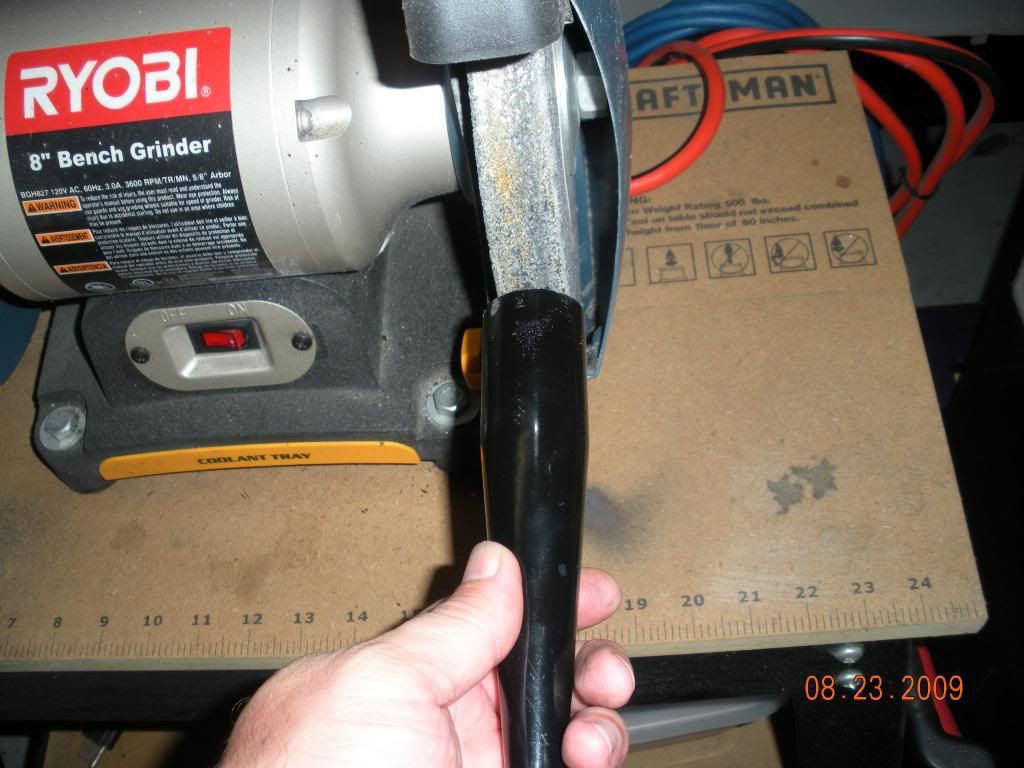
If you are contemplating an URD or NST SS kit, this would be an excellent time to install one. If you are not installing a URD or NST SS, you can save yourself a little time and just depress the top retaining ring about ¼” and rotate it counter clockwise. This will release the shifter and you can pull it straight out. If you are installing an URD or NST SS, the top plate will need to be removed. See Pictures 1 & 2.
Next you need to decide the length of the shifter. It is difficult to determine what each individual will prefer for a finished shifter length. I think the 9 ½” will fit most people’s needs. Be forewarned, if you decide on a shorter length it will require a healthy slap to get into reverse. I like the feel of the 8 ½” shifter, but other people may have difficulty in driving your truck. Occasionally you will need to have service people drive your truck. They will have difficulty in finding reverse.
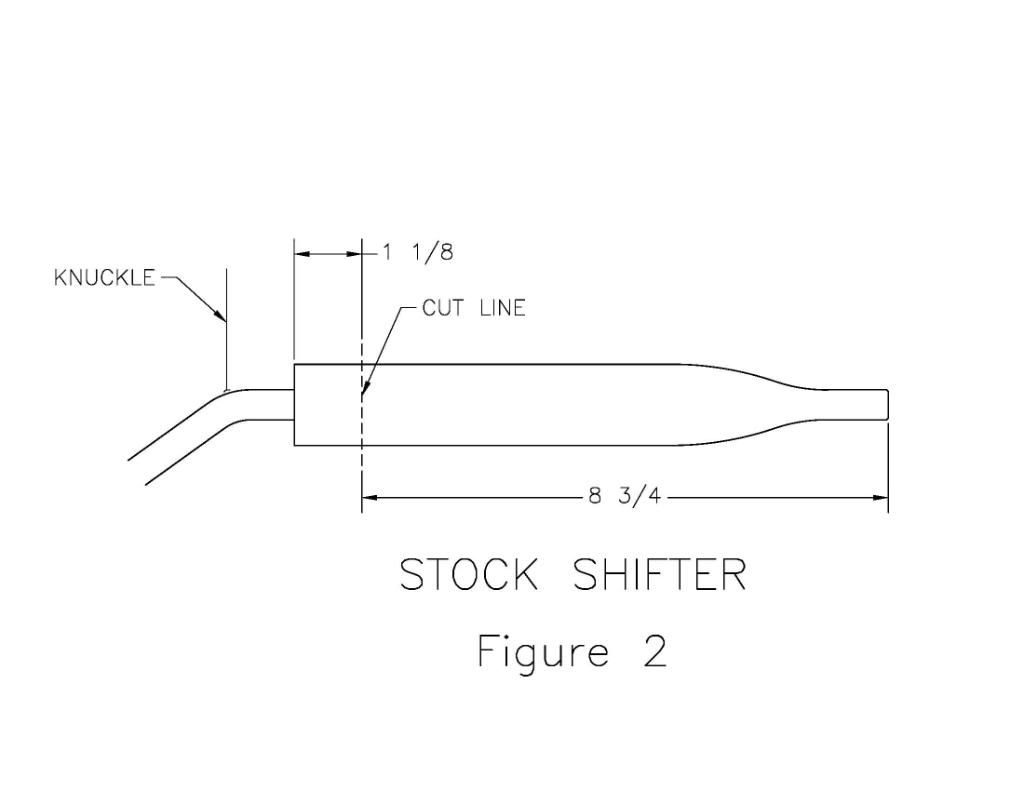
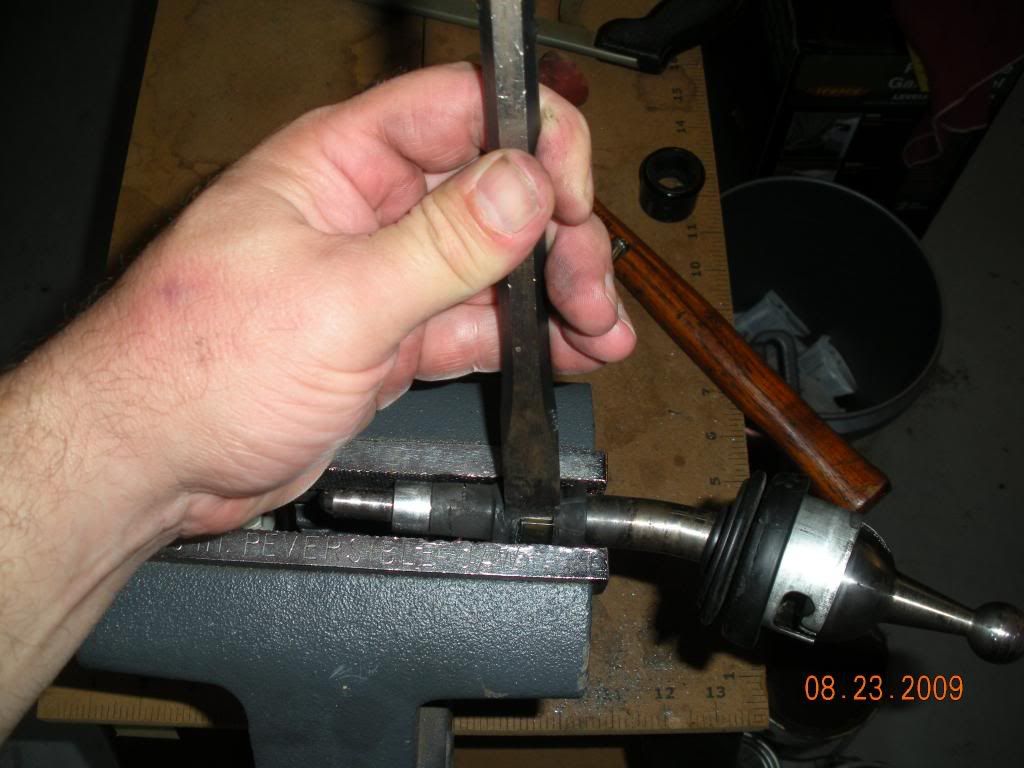
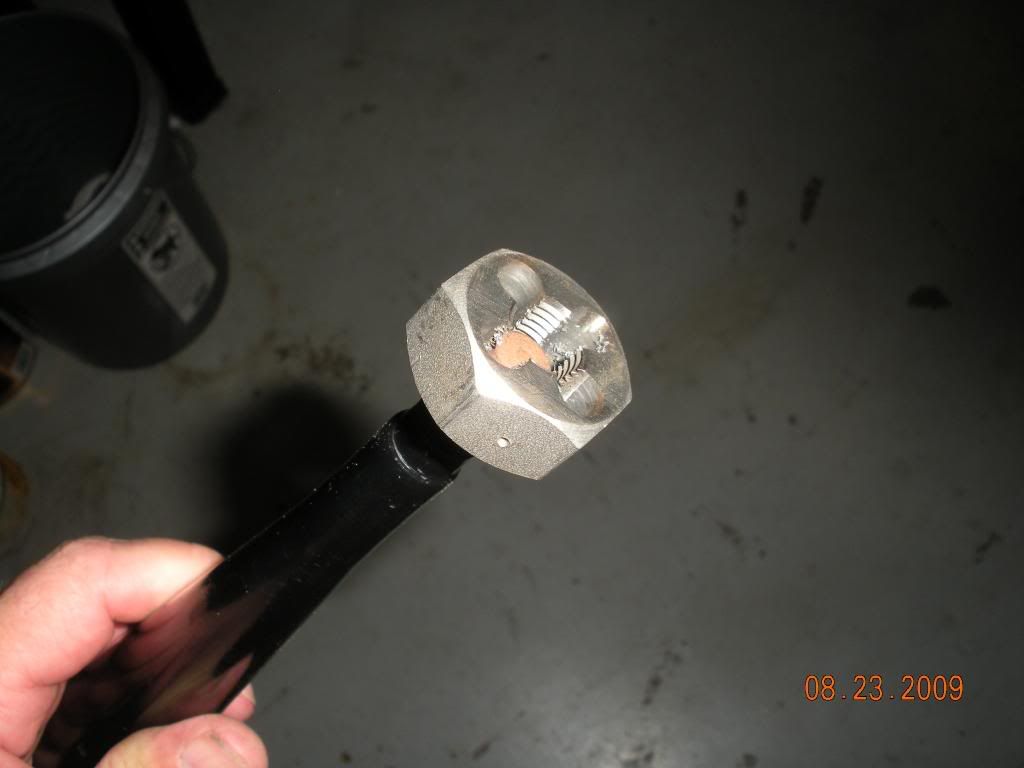
I start by cutting of 1 1/8” off the base of the shifter. I use a hack saw for this. See Figure 2 & Picture 3.
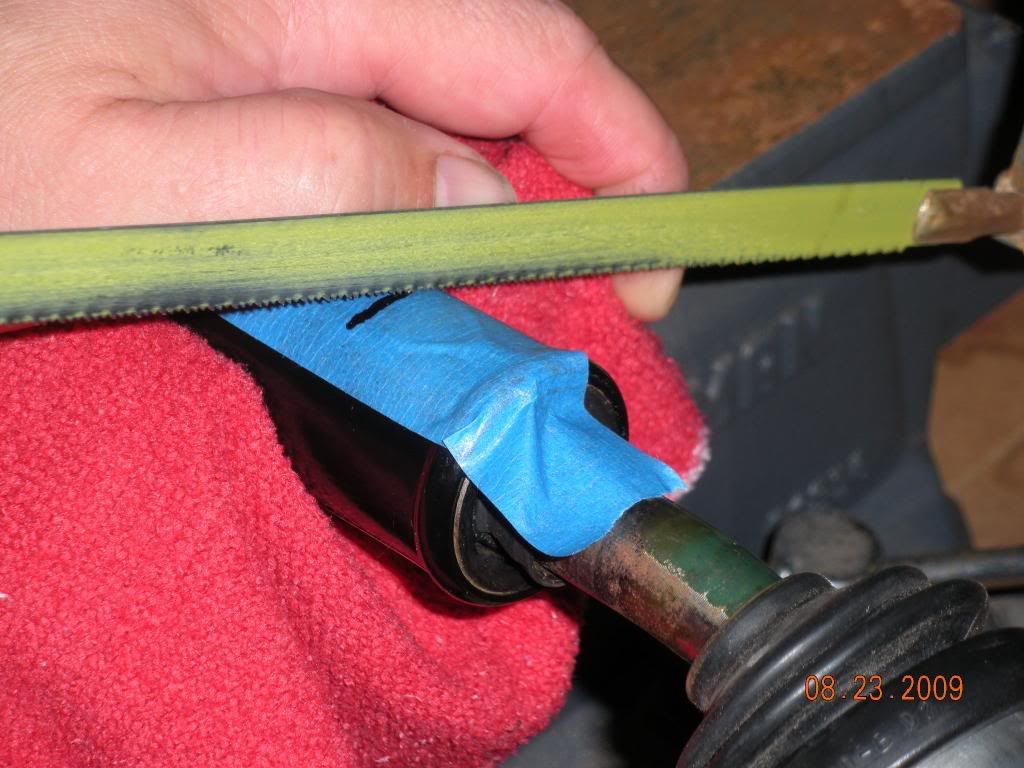
Picture 3
There is a central rod inside of this outer tube. DO NOT CUT THROUGH THE CENTRAL ROD. As you cut through the outer tube, you need to rotate the shifter. You just want to cut though the outer tube. See Picture 4.
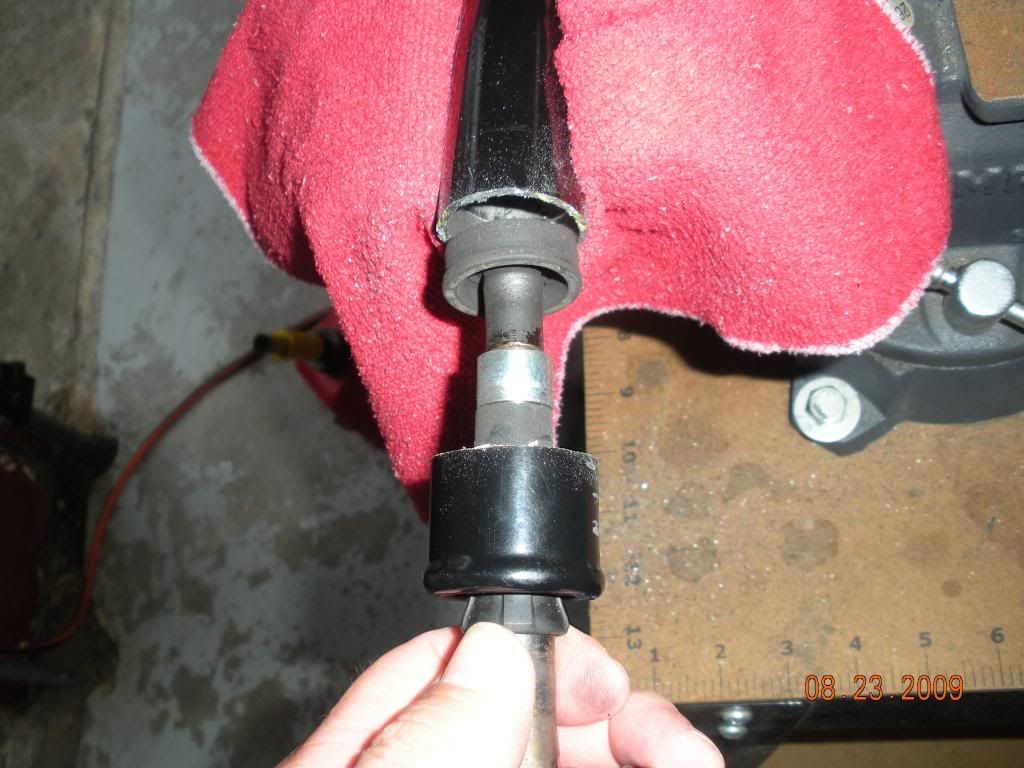
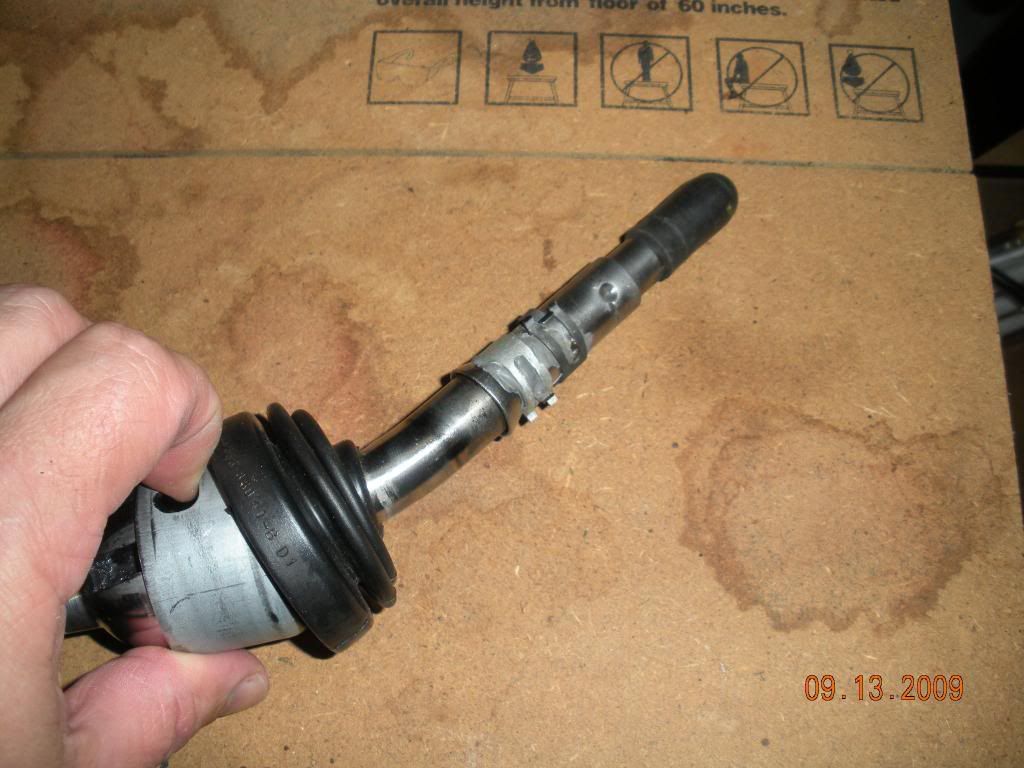
After the outer tube is cut through, pull the lower section out. The tip will have a rubber plug on it that will need to be removed (See Picture 5). Use a Dremel tool to cut this off. I have had some that just pulled off. Most will need to be cut off.
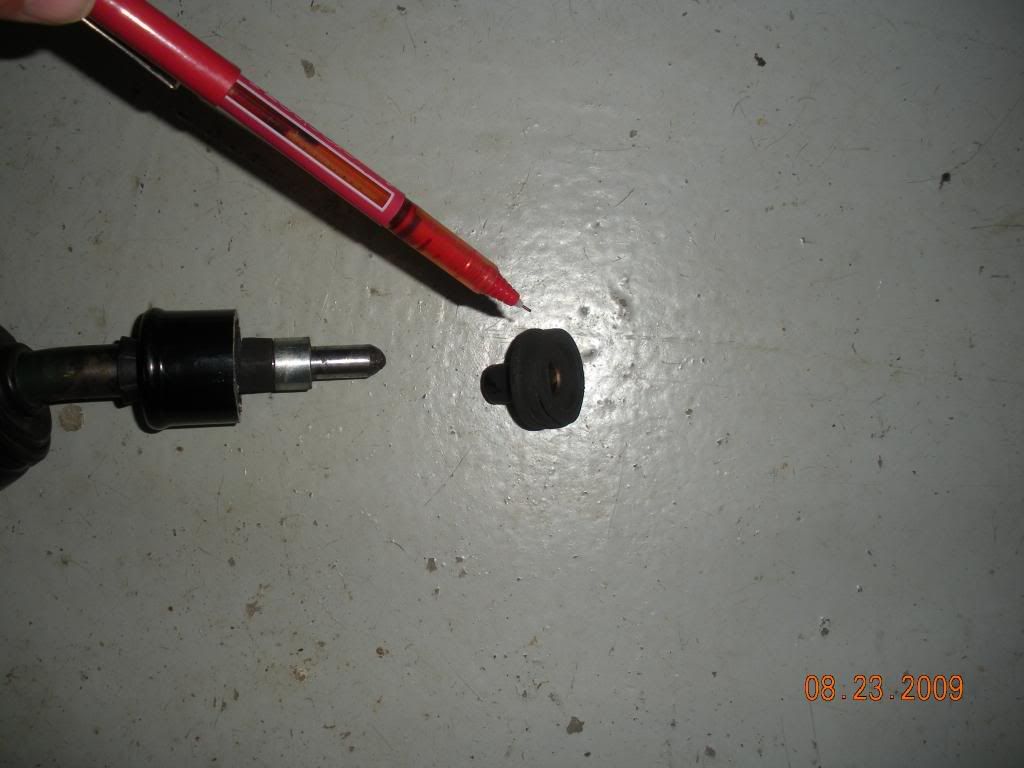
You can knock the lower piece of the outer tube off the lower central shaft. See picture 6.
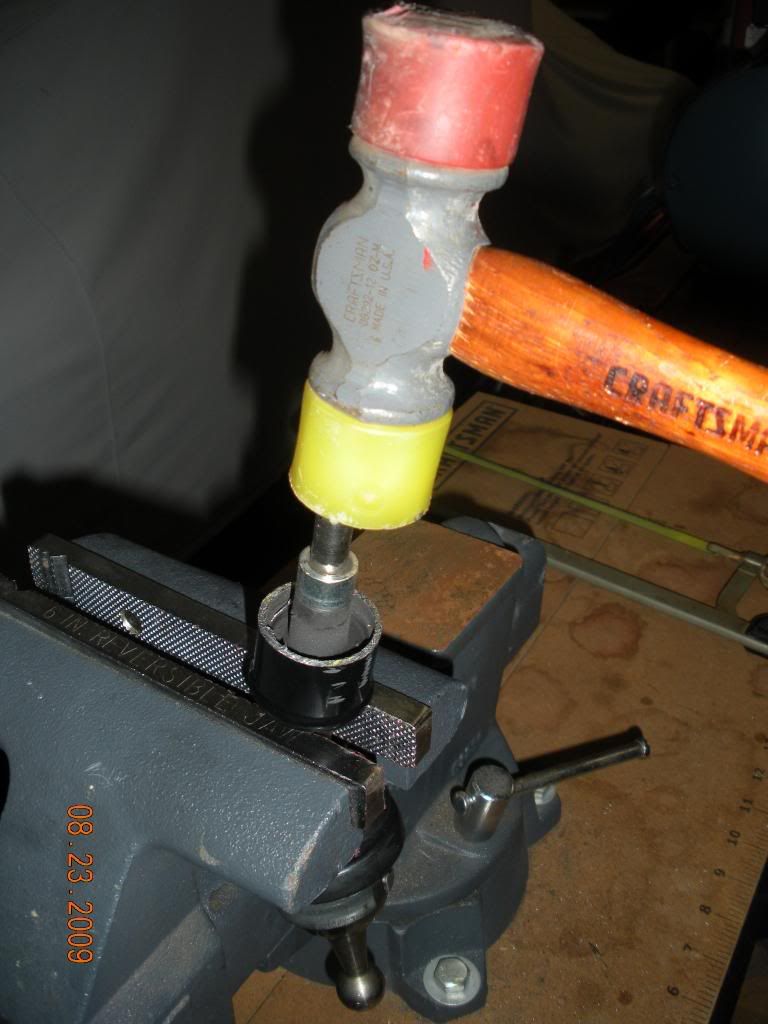
There is also a plastic clip on the lower rubbers bushing. This can be cut off with a dremel or one swing of a hammer on a chisel will take this off, See Picture 7.
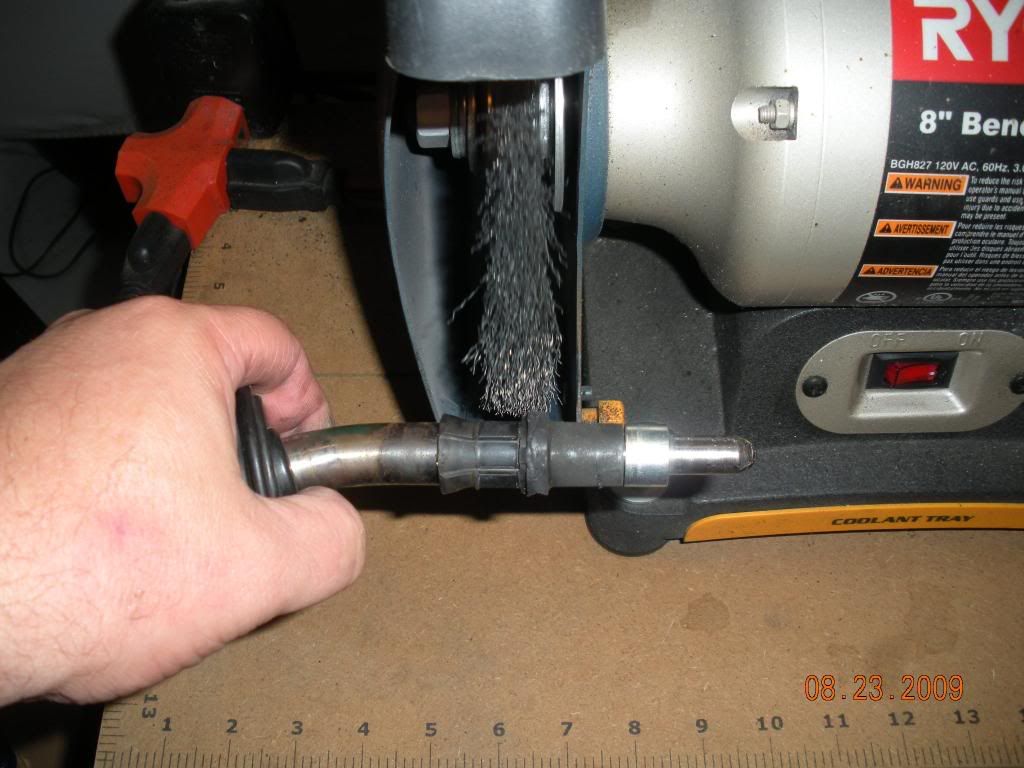
You can use a bench grinder to remove the remainder of the rubber bushing on the lower shaft. See Picture 8.
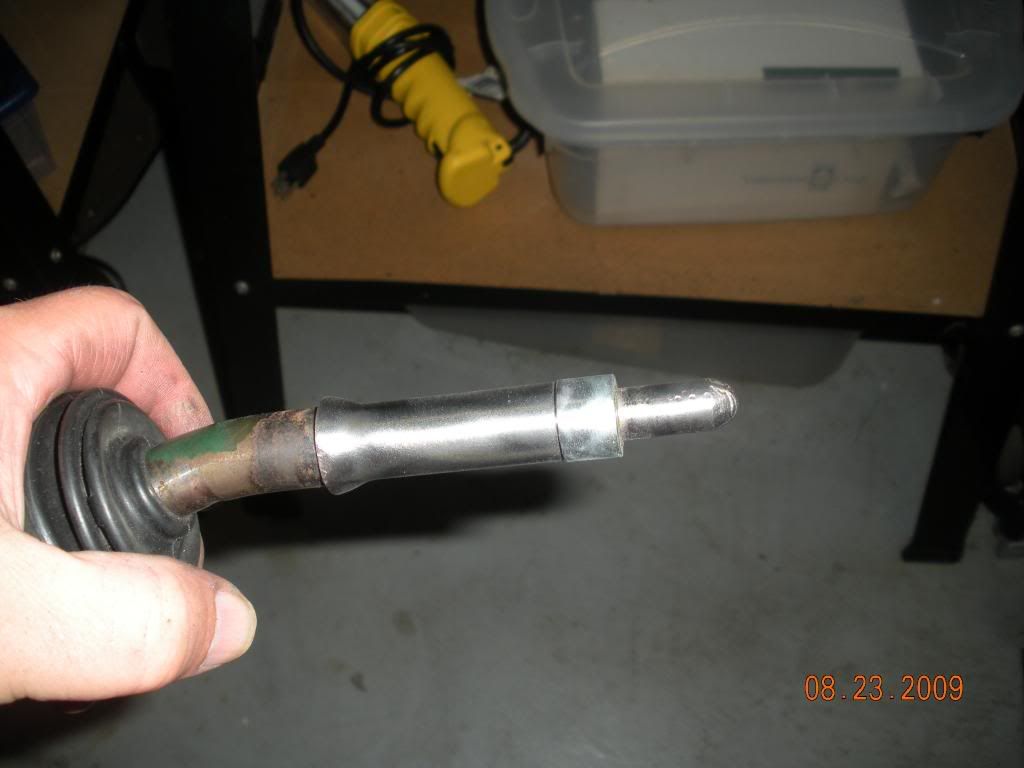
Look at Picture 9. This shows the rubber removed.
I used J-B weld (available at any Auto parts store) and glued two small hose clamps. You want to use pinch type hose clamps. Allow the J-B Weld to dry over night. See Picture 10.
I ground the tips off the hose clamp a little. In picture 10, there is a vacuum cap over the tip of the lower shaft. This was because this was going to be an 8 ½” long shifter. You do not want any metal from the central lower shaft touching any of the outer metal tube. Many people may skip this step. I have also cut little grooves in the tip. The point of the hose clamps or the grooves is to give the urethane epoxy something to grip. This will help give the epoxy a better grip and reduce the chances in breaking the bond if you put a twisting motion on the shifter.
Take the outer tube you cut off and deburr the hacksaw cut. See Picture 11.
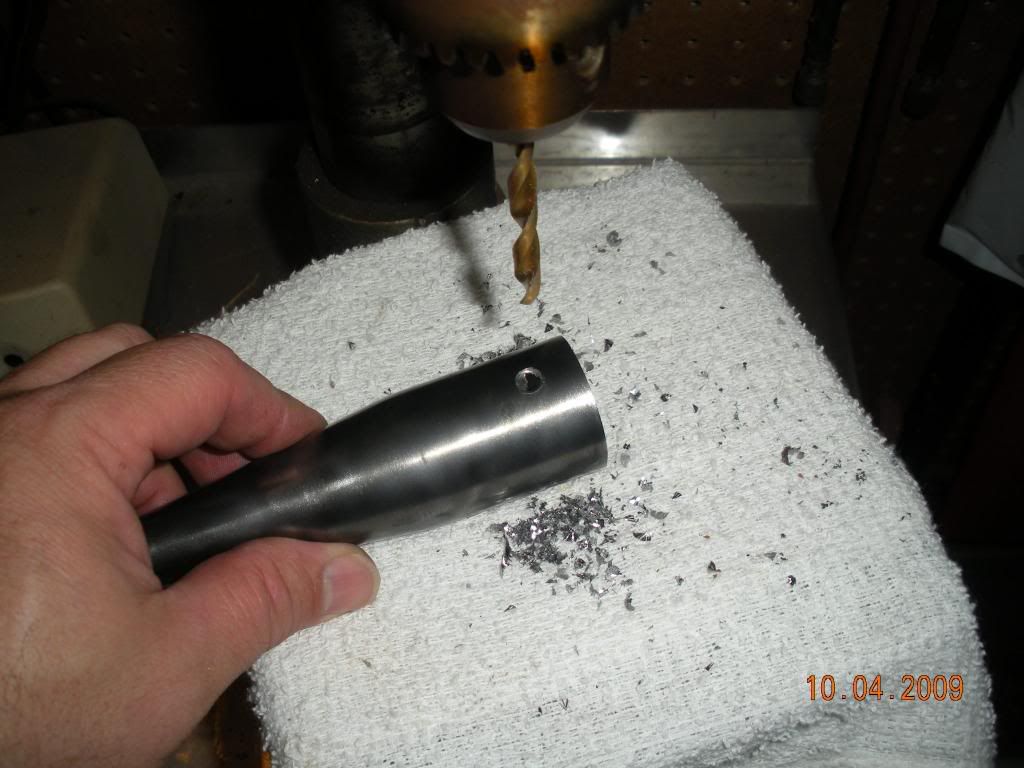
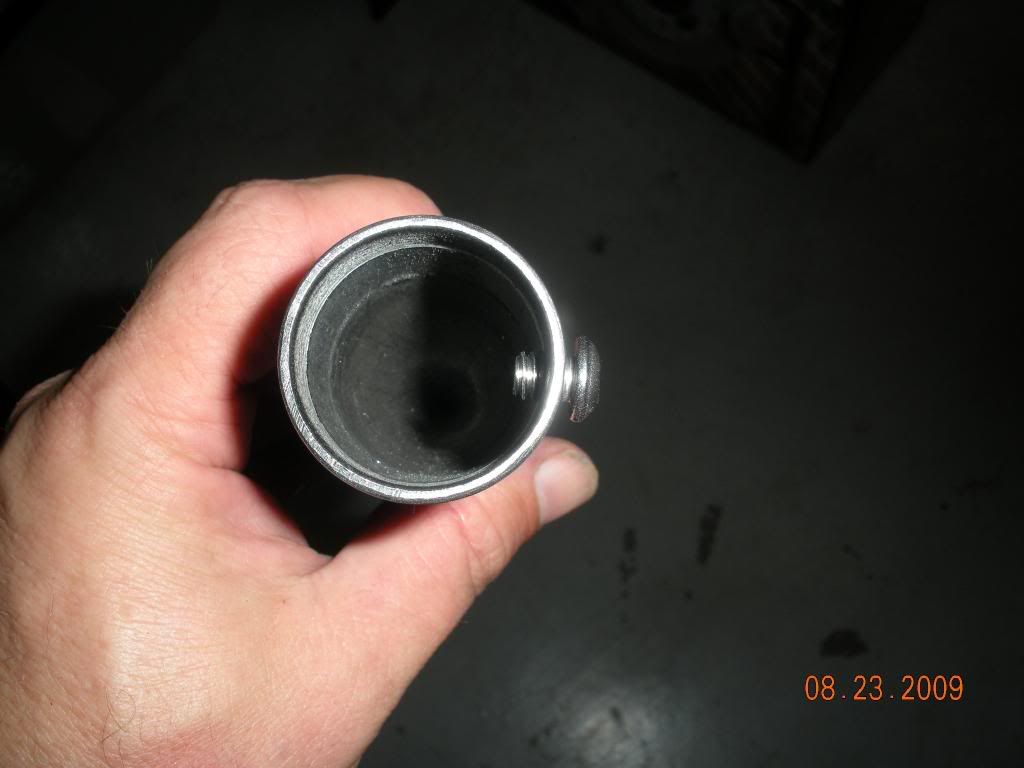
Drill and tap three (3) perimeter holes along the base of the tubing. I am using ¼-20UNC bolt holes. See Pictures 12 & 13.
I usually strip the outer powder coating. I will later prime and paint the shifter outer tube. See Picture 14.
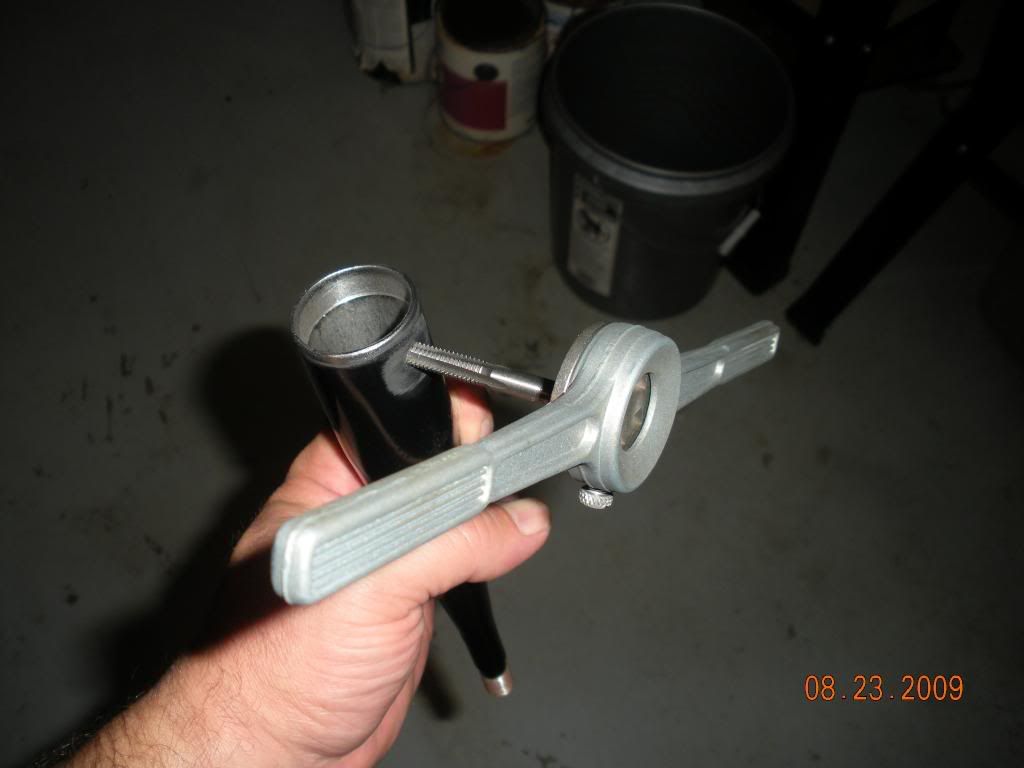
While I am at it, I usually chase the threads on the upper tip. I can usually cut a few extra threads. See Picture 15.
Picture 15
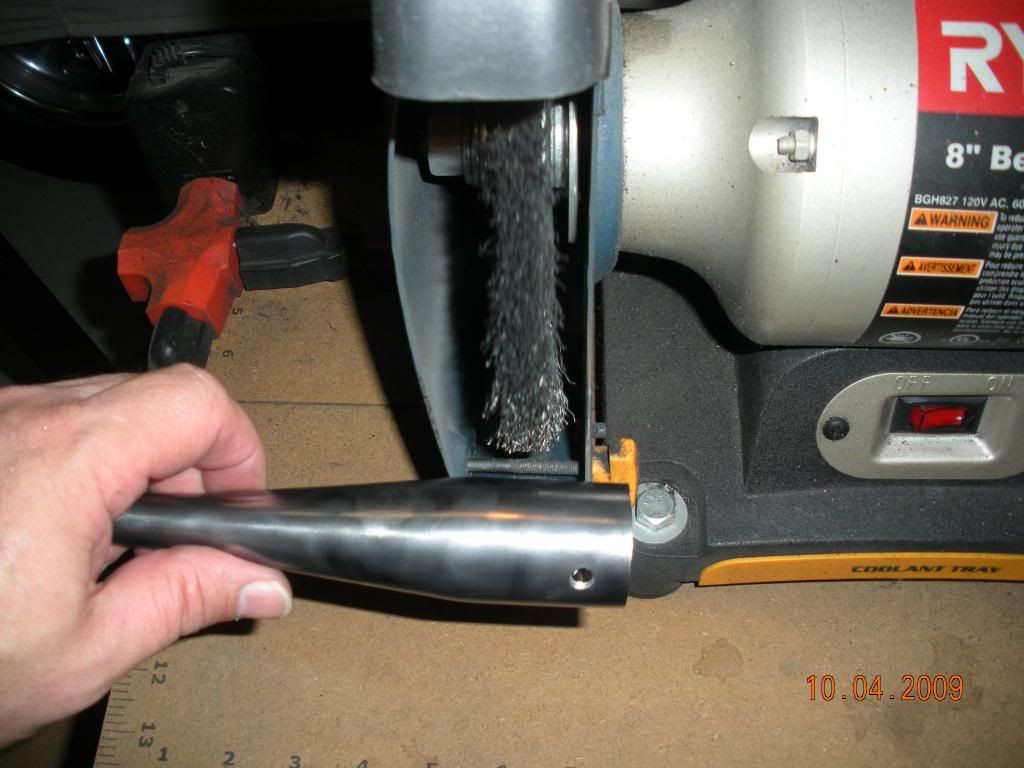
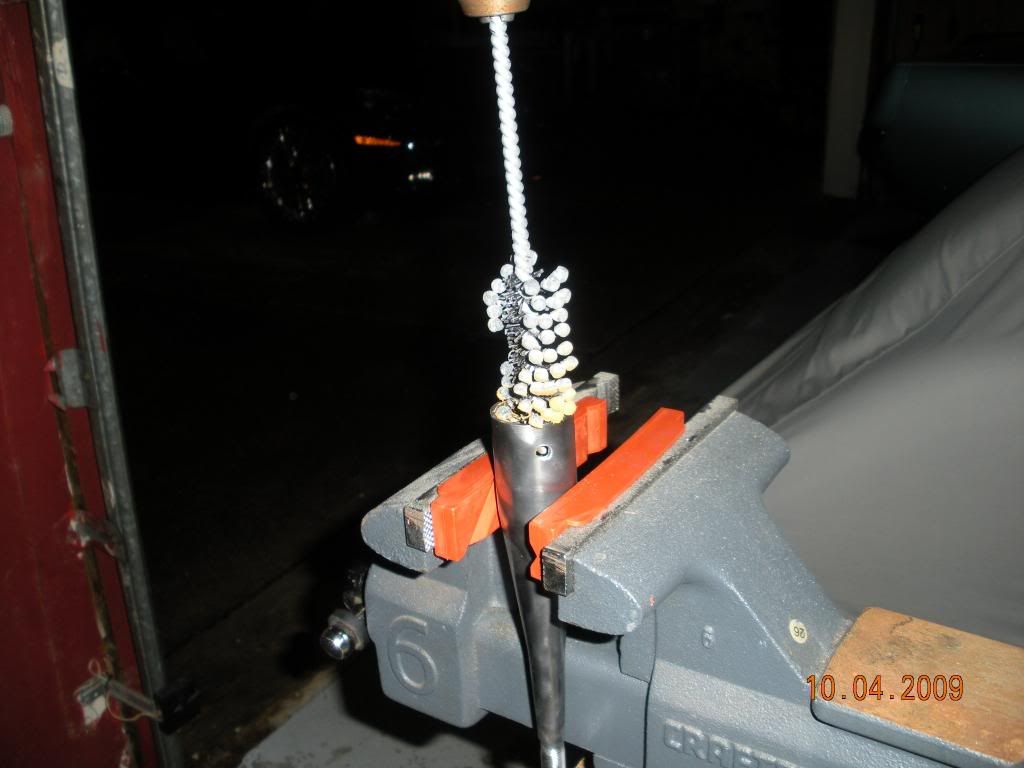
I use an old flex hone to clean up the bore of the outer tubing. You could use a wire brush. If you do not have these, you could use a round file. It won’t do as good of job, but should give an adequate bite. See Picture 16.
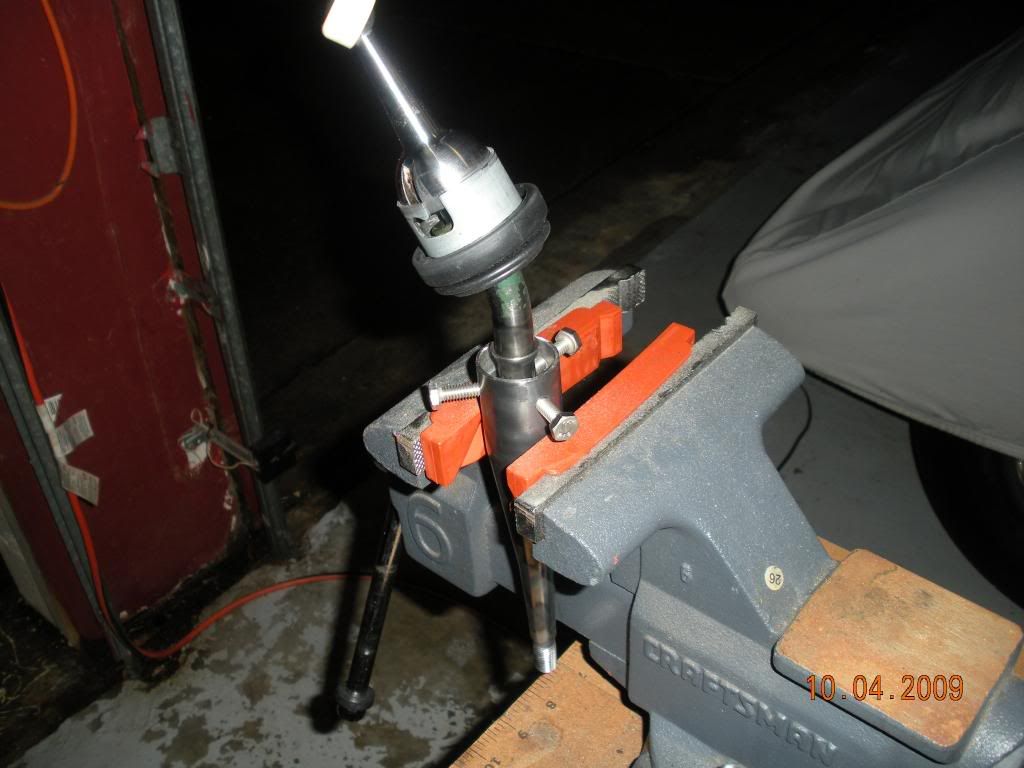
After you have honed or wire brushed the bore, you need to clean out the dust. Swab it out with a rag with a little solvent. Know you are ready to put the two parts together. Use three (3) ¼-20UNC x 1 Long hex bolts. These hex bolts are only to hold the parts together while the epoxy is drying. After the epoxy is dried, we will replace these bolts with short ¼” long, Button Head Screws. See Picture 17.
Snug up the hex bolts. This is where you adjust your length. You can position the lower shaft in the outer shaft. Ideally the length from the knuckle to the tip of the shifter should be 9 ½”. You can go shorter.
8 ½” is the minimum length. Remember, the shorter you go, the harder finding reverse will be.
Once you have confirmed your length and the bolts are snugged up, look down the bore and make sure the lower shaft is in the center of the outer tube. You may have to adjust the bolts to achieve this.
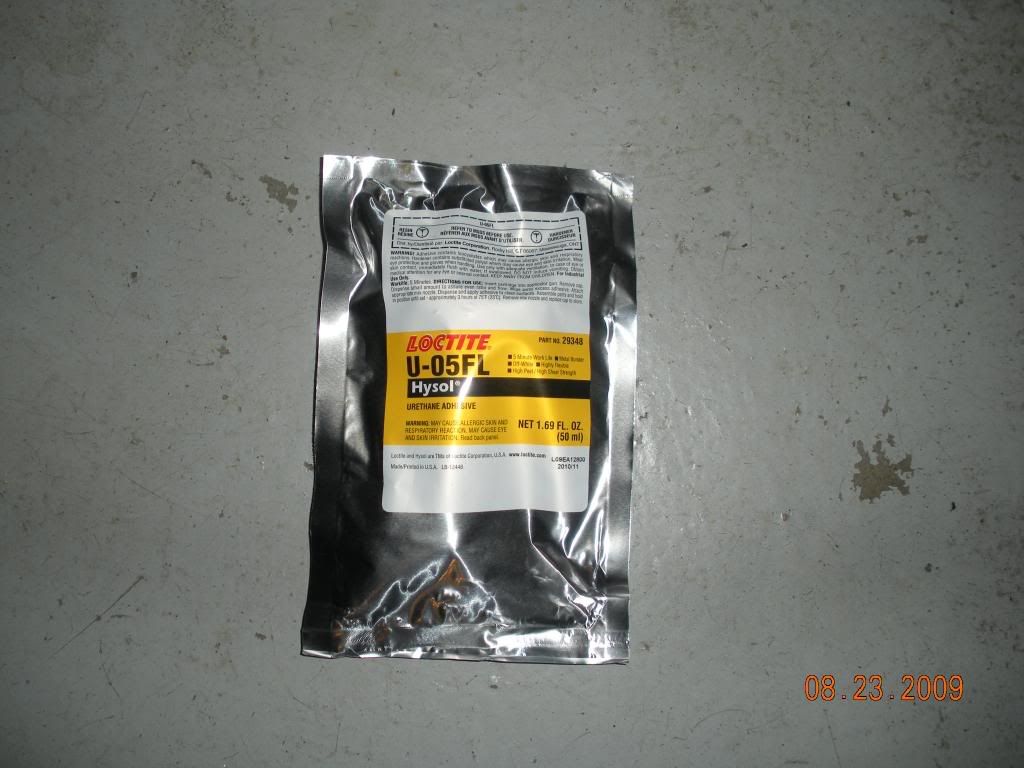
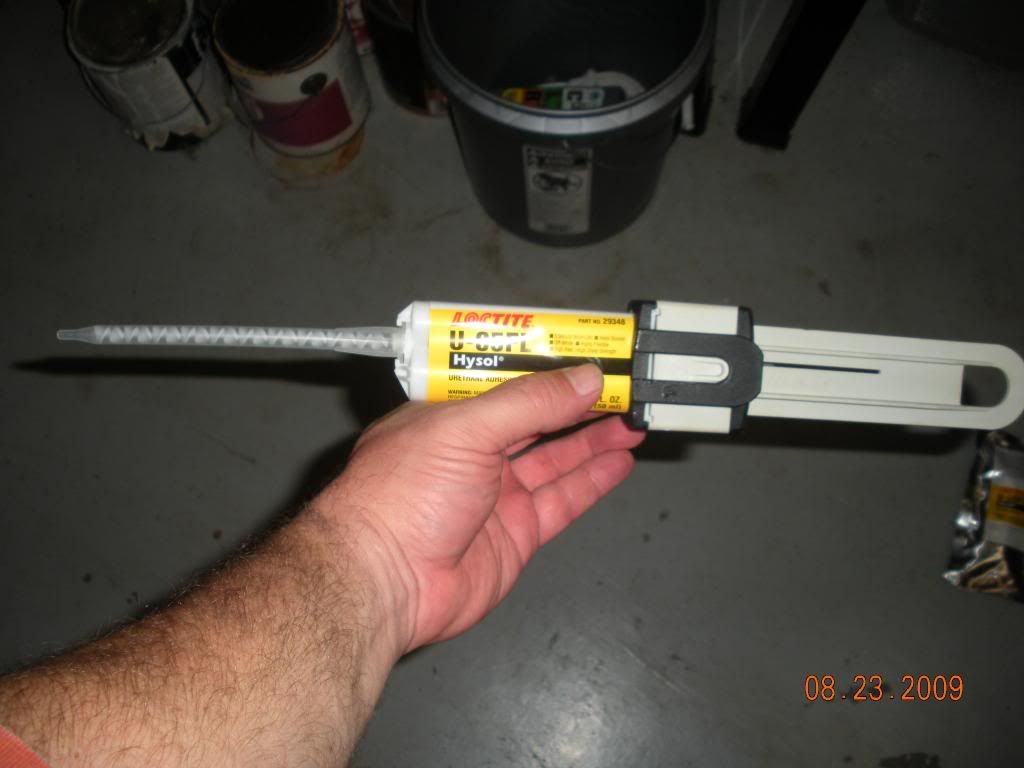
Now you are ready to epoxy the shifter together. I prefer Loctite U-05FL. See Picture 18. This uses a special gun with mixer tips. The mixer tips get throw away after each use. See Picture 19. These can be purchased from McMaster Carr.
www.mcmastercarr.com.
Picture 19
Glue the two parts together. You are going to fill up the outer tube. See Picture 20.

Go have a couple of beers. The epoxy is supposed to be dry in a day. I find when it is poured this thick, it usually takes two (2) days. When it is dry, remove the hex bolts and replace with short ¼” long button head bolts. You could also use hex bolts. You want short bolts. You do NOT want the bolts to touch the central shaft.
This epoxy, when dry, has a little flexibility. It will have the density similar to a polyurethane bushing. This is important to use a urethane epoxy. Most epoxies will dry hard as a rock.
The urethane epoxy will absorb transmission noise.
Picture 21 shows how far these ¼” bolts are going to protrude into the outer tube.
Before I put the short bolts in, I put a squirt of epoxy in each tapped hole.
Then prime and paint the outer tube. I have been using a Satin black for the color.
The shifts will be firm and crisp. There will be no mushy feel. You may have to “slap” the shifter to get into reverse. You may have to do this a couple of times to get the rhythm down. Pictures 22 & 23 are of an 8 ½” shifter.
There have been a few write ups on cutting down factory shifters. The inspiration for this mod is Stevenredx write up. This is his write up:
http://www.xr-underground.com/vb3/showthread.php?t=4549
The stock shifter has an internal rubber bushing. This bushing is prone to failure. When it wears out the shifter becomes very sloppy. Even when new, the shifter is a little “mushy”. This rubber bushing has one important feature “it isolates transmission vibration from the cab”.
If you make a solid mount shifter ( i.e. remove the bushing and weld it together) the transmission will transmit some noise to the cab. You may find this annoying.
This write up deals with two features:
1.Eliminating this rubber bushing.
2.Cutting the stock height of the shifter.
I have tried a few different formulas for doing this. This write up has evolved over the past year. This is my latest version (October 11, 2009).2.Cutting the stock height of the shifter.
While this write up addresses the factory shifter, it can also be done to the TRD SS shifter. The TRD shifter has this same rubber bushing. The TRD SS is about 1 ½” shorter than the stock shifter. I have also done a 4 wheel drive shifter. This is LONGER than the X-Runner shifter. The 4 wheel drive is ½” longer than the X-Runner.
I have found it difficult to find a good reference point for measuring the shifter. I prefer to use the bend in the lower part of the shifter. I call this the knuckle. See Figure 1.
This figure shows the length dimensions of the different shifters.
If you have never pulled the shifter out, refer to the URD SS install instructions. These are excellent. It will show you how to pull the console and boot out.
If you are contemplating an URD or NST SS kit, this would be an excellent time to install one. If you are not installing a URD or NST SS, you can save yourself a little time and just depress the top retaining ring about ¼” and rotate it counter clockwise. This will release the shifter and you can pull it straight out. If you are installing an URD or NST SS, the top plate will need to be removed. See Pictures 1 & 2.
Picture 1
Picture 2
Next you need to decide the length of the shifter. It is difficult to determine what each individual will prefer for a finished shifter length. I think the 9 ½” will fit most people’s needs. Be forewarned, if you decide on a shorter length it will require a healthy slap to get into reverse. I like the feel of the 8 ½” shifter, but other people may have difficulty in driving your truck. Occasionally you will need to have service people drive your truck. They will have difficulty in finding reverse.
I start by cutting of 1 1/8” off the base of the shifter. I use a hack saw for this. See Figure 2 & Picture 3.
Picture 3
Picture 4
Picture 5
Picture 6
There is also a plastic clip on the lower rubbers bushing. This can be cut off with a dremel or one swing of a hammer on a chisel will take this off, See Picture 7.
Picture 7
You can use a bench grinder to remove the remainder of the rubber bushing on the lower shaft. See Picture 8.
Picture 8
Look at Picture 9. This shows the rubber removed.
Picture 9
I used J-B weld (available at any Auto parts store) and glued two small hose clamps. You want to use pinch type hose clamps. Allow the J-B Weld to dry over night. See Picture 10.
Picture 10
I ground the tips off the hose clamp a little. In picture 10, there is a vacuum cap over the tip of the lower shaft. This was because this was going to be an 8 ½” long shifter. You do not want any metal from the central lower shaft touching any of the outer metal tube. Many people may skip this step. I have also cut little grooves in the tip. The point of the hose clamps or the grooves is to give the urethane epoxy something to grip. This will help give the epoxy a better grip and reduce the chances in breaking the bond if you put a twisting motion on the shifter.
Take the outer tube you cut off and deburr the hacksaw cut. See Picture 11.
Picture 11
Drill and tap three (3) perimeter holes along the base of the tubing. I am using ¼-20UNC bolt holes. See Pictures 12 & 13.
Picture 12
Picture 13
Picture 14
Picture 15
Picture 16
Picture 17
Snug up the hex bolts. This is where you adjust your length. You can position the lower shaft in the outer shaft. Ideally the length from the knuckle to the tip of the shifter should be 9 ½”. You can go shorter.
8 ½” is the minimum length. Remember, the shorter you go, the harder finding reverse will be.
Once you have confirmed your length and the bolts are snugged up, look down the bore and make sure the lower shaft is in the center of the outer tube. You may have to adjust the bolts to achieve this.
Now you are ready to epoxy the shifter together. I prefer Loctite U-05FL. See Picture 18. This uses a special gun with mixer tips. The mixer tips get throw away after each use. See Picture 19. These can be purchased from McMaster Carr.
www.mcmastercarr.com.
Picture 18
Picture 19
Picture 20
Go have a couple of beers. The epoxy is supposed to be dry in a day. I find when it is poured this thick, it usually takes two (2) days. When it is dry, remove the hex bolts and replace with short ¼” long button head bolts. You could also use hex bolts. You want short bolts. You do NOT want the bolts to touch the central shaft.
This epoxy, when dry, has a little flexibility. It will have the density similar to a polyurethane bushing. This is important to use a urethane epoxy. Most epoxies will dry hard as a rock.
The urethane epoxy will absorb transmission noise.
Picture 21 shows how far these ¼” bolts are going to protrude into the outer tube.
Picture 21
Before I put the short bolts in, I put a squirt of epoxy in each tapped hole.
Then prime and paint the outer tube. I have been using a Satin black for the color.
The shifts will be firm and crisp. There will be no mushy feel. You may have to “slap” the shifter to get into reverse. You may have to do this a couple of times to get the rhythm down. Pictures 22 & 23 are of an 8 ½” shifter.
Picture 22
Picture 23