HiTek21
New Member
- Joined
- Apr 12, 2007
- Messages
- 1,197
- Reaction score
- 0
Disclaimer: This is for information only. Any bodily injury or damage to your property is at your own risk.
This installation was done on a 2007 Tacoma X-Runner 6 Speed. These instructions may or may not work on a 4x4 or 5 speed model. Additional parts & tools may be required for 4wd or Pre-runner
Installation Time
45 minutes - 90 minutes
Difficulty
5 out of 10
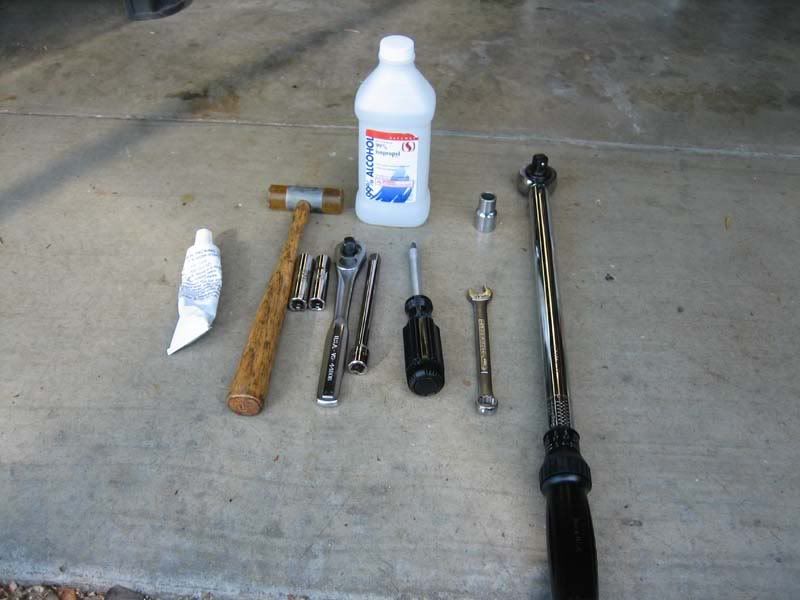
Tools Needed
12mm 3/8 drive socket
12mm 1/2 drive socket
10mm 3/8 drive Socket
12mm Combo wrench
3/8" Ratchet
3/8" Ratchet extension
Torque wrench
Assorted philips & flathead screwdrivers
Plastic Hammer
Rubbing Alcohol
RTV Silicon or Toyota FIPG Sealant (P/N 00295-01281)
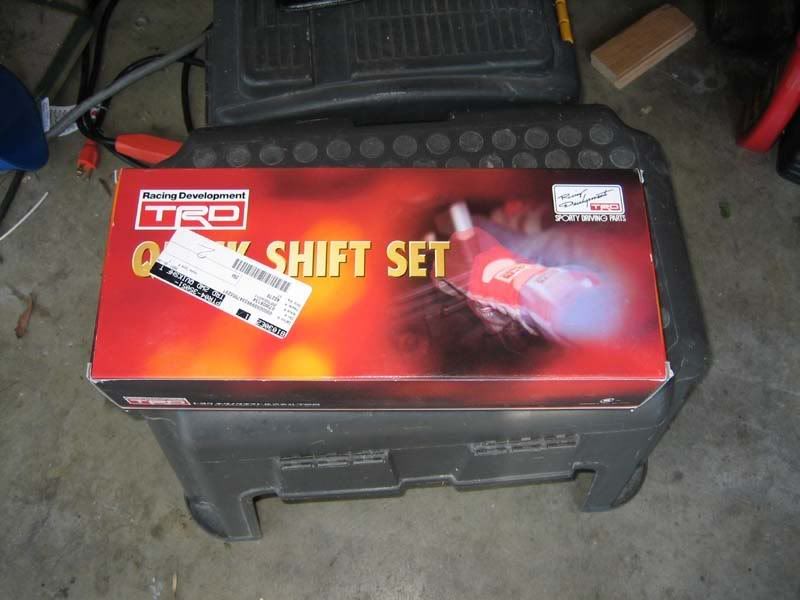
TRD Quickshifter 2wd P/N PTR04-35051 ($287.50 @ TRDParts4u.com)
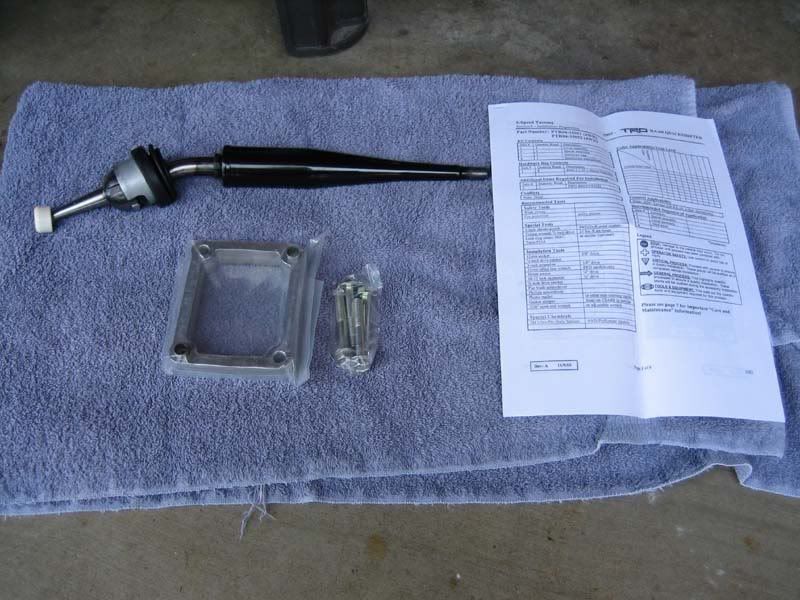
Kit's Contents
1 Short Shifter
1 Spacer
4 Bolts
Installation Instructions
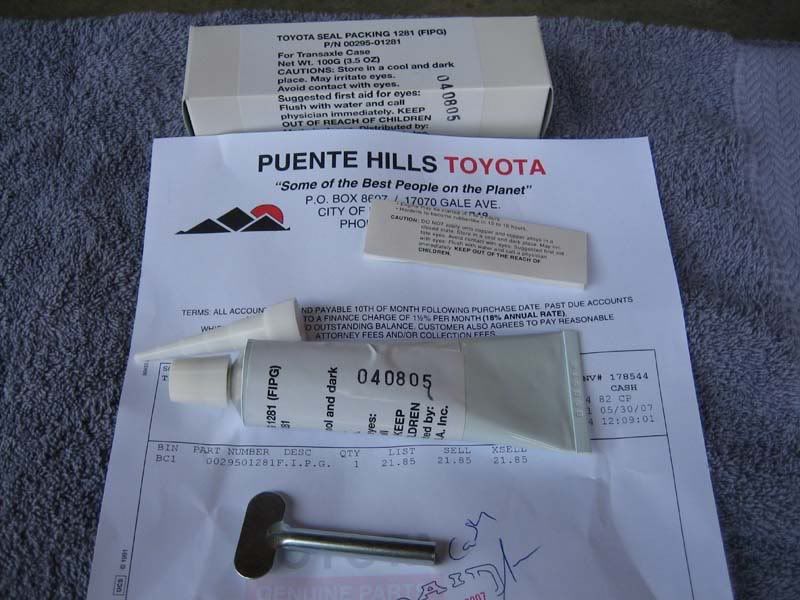
Toyota's Form In Place Gasket - P/N 00295-01281
Cost $23 from Puente Hills Toyota. It just gives me piece of mind knowing the materials I used are correct.
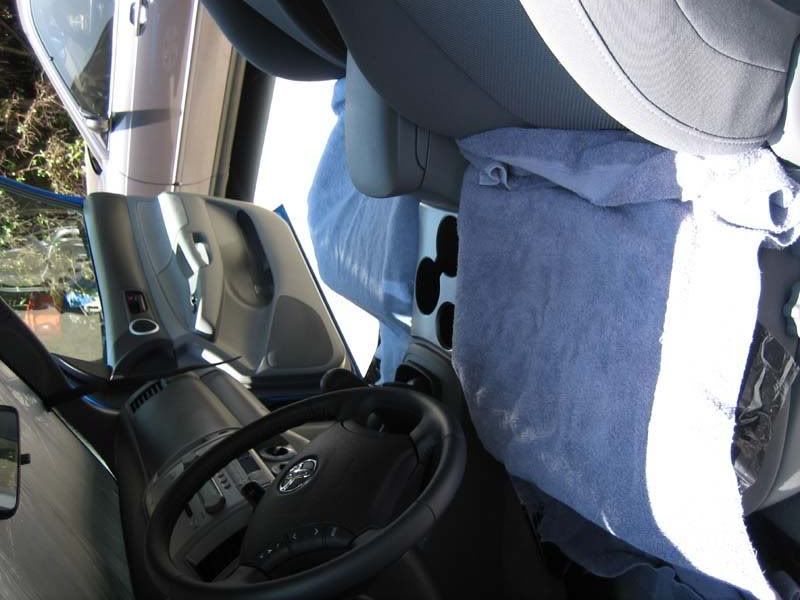
Step 1: Cover up your seats & floors with an old Towel to keep any grease or oil off your fabric incase you drop something
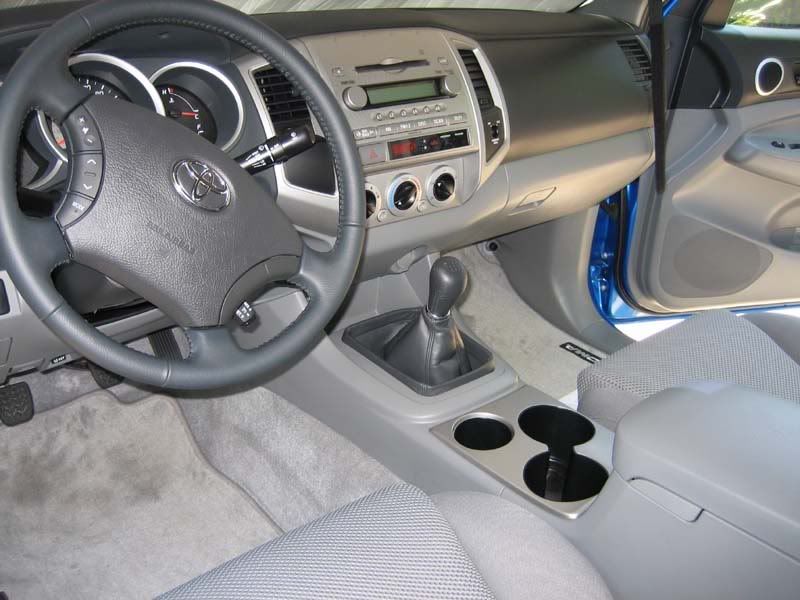
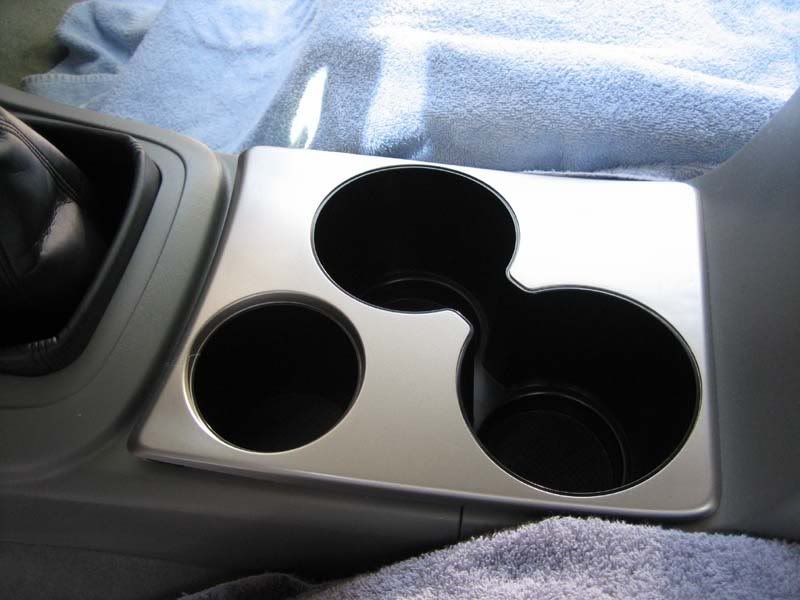
Step 2: Remove the center consoles cup holder by lifting it straight up, you don't need to pry it with a screwdriver. There are a few clips that secure the cup holders down. Just be patient when you remove it to prevent breaking any clips. Mine came off fairly easily.
Step 3: Remove the center console compartment.
Open the lid and remove the carpet. Use a small screw drive to pry up a corner of the carpet and lift up.
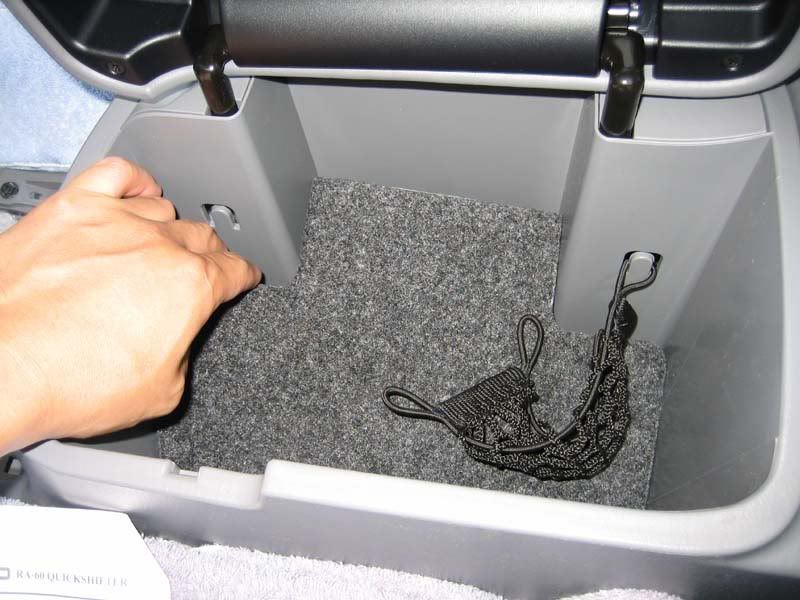
Under the carpet are 2 x 10mm Bolts , remove them and store .
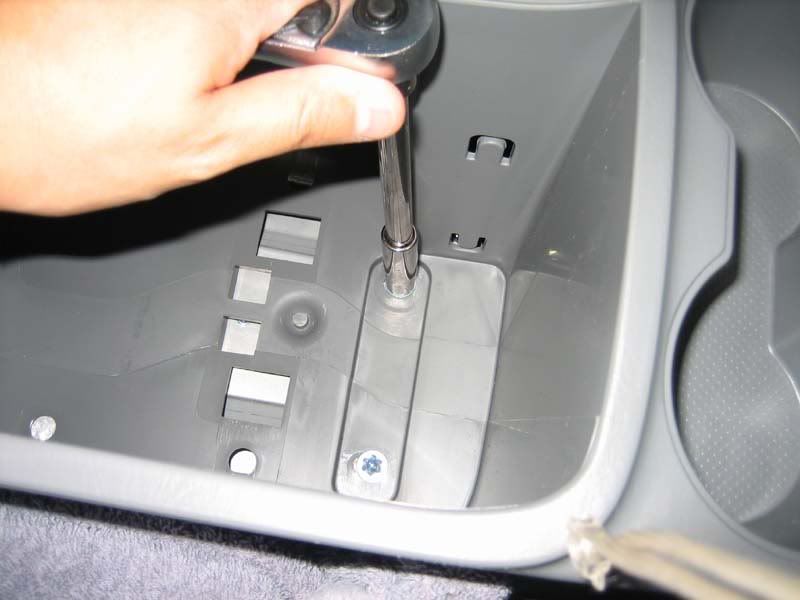
Where the cup holder was there are 2 philips head screws, remove and store.
Remove the center console compartment by lifting up. There are a couple of hooks that secure it (you can partially see them in the picture). It comes off easily so don't force it off.

Step 4: Remove the center console.
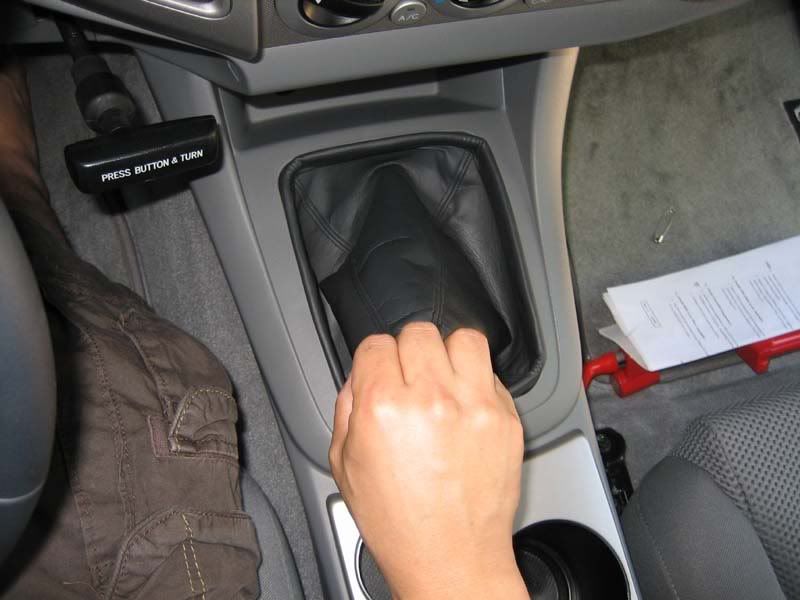
Drop the shifter into 2nd, 4th, or 6th gear and remove shift knob.
Remove the two screws that are located under where the cupholder was.

Pull the center console back towards the rear of the cab and lift up at the sametime. There are 3 clips total holding the console. They should come off easily again don't force just use a little patients.
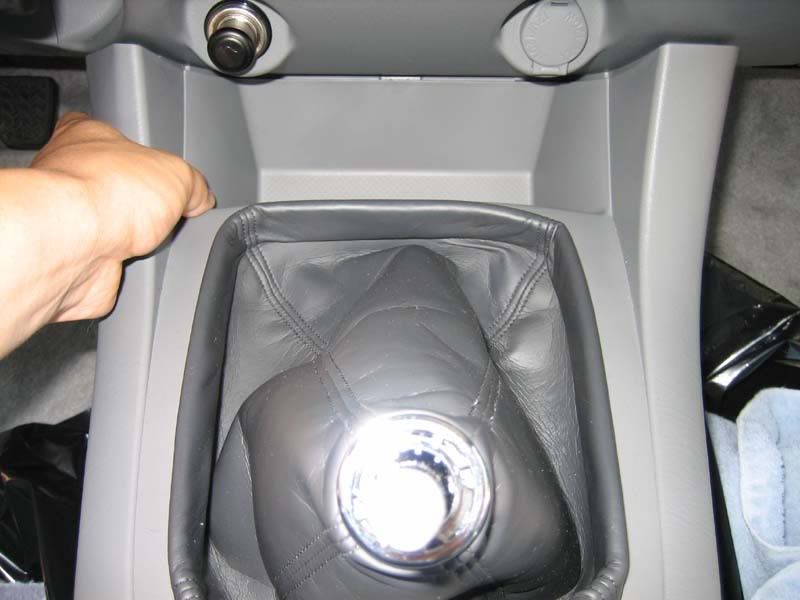
Step 5: remove your shifter's dust boot by unscrewing the two philips head screws on the side closer to the center console compartment (located on the bottom of the picture). There are two clips that are holding down the front. Use a small screw driver and push the center down and it will disengage the clip. Lift up and remove. Store all hardware in safe place.
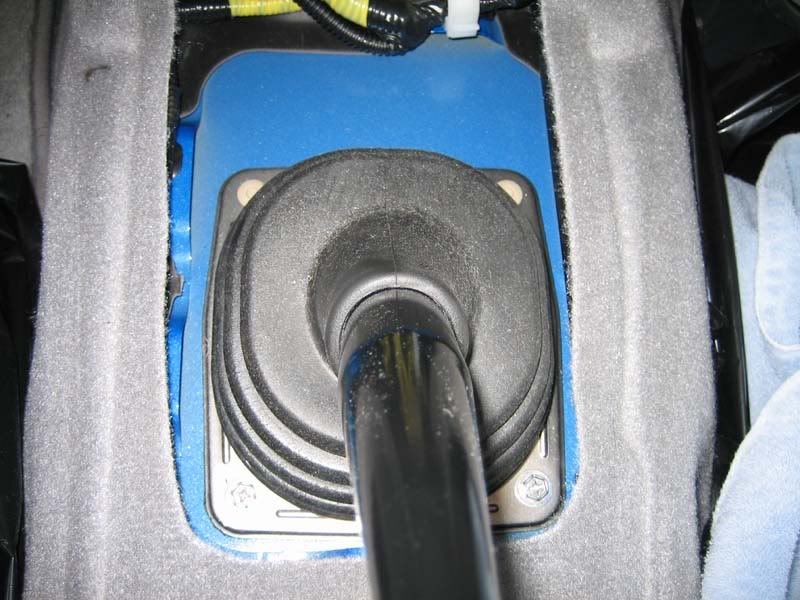
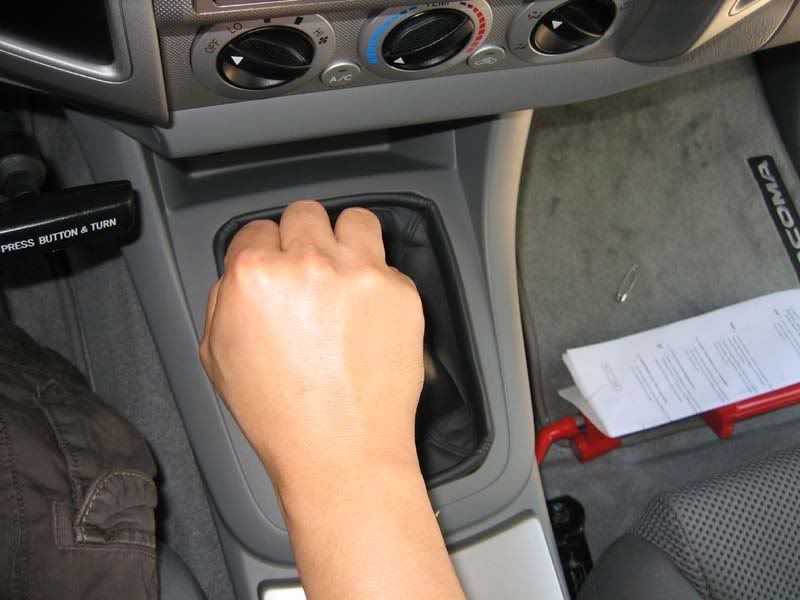
Step 6: Lift up the rubber dust boot to expose the shift lever cap
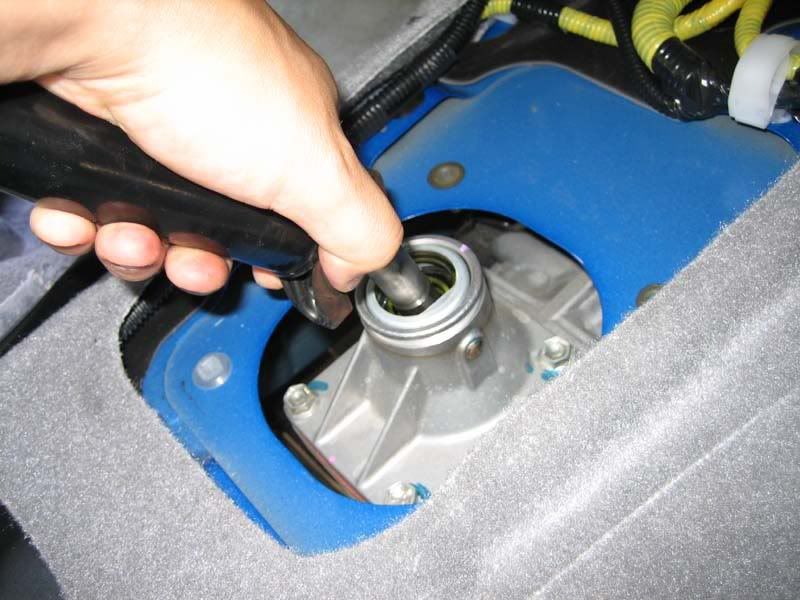
Next unscrew the shift lever cap by pressing down on the center part and turning it counter clockwise. It should just pop off. You can remove and store your old shifter.
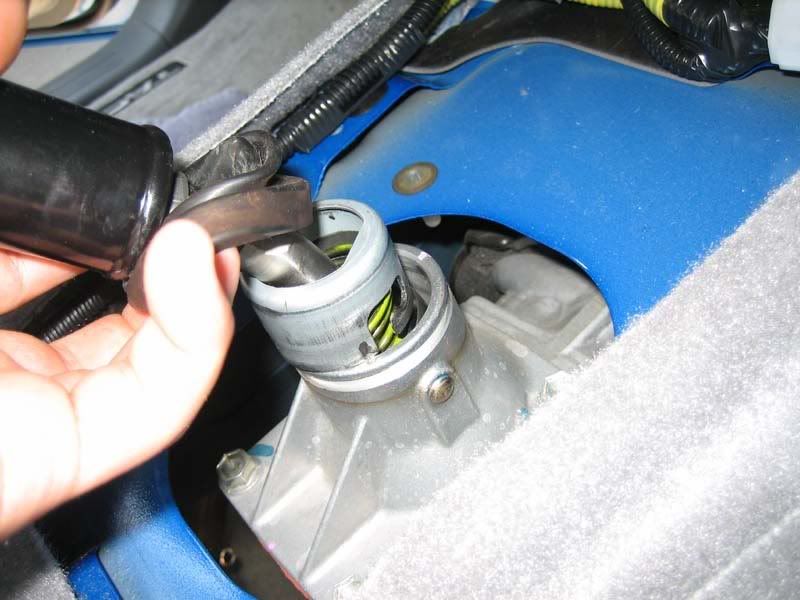
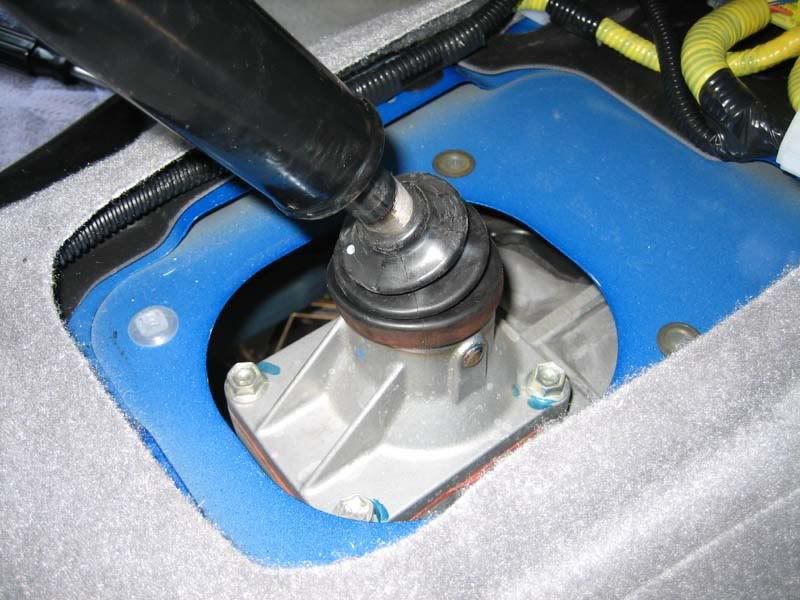
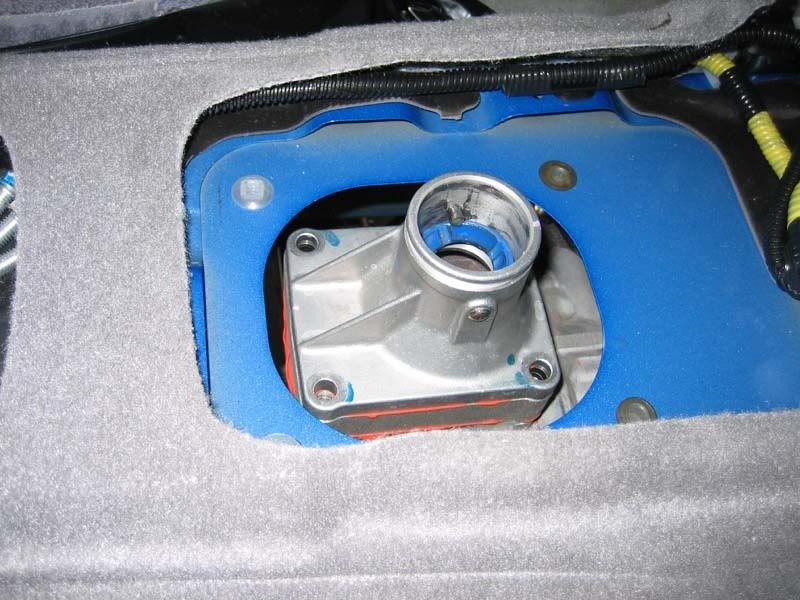
Step 7: Remove the shift lever retainer by unscrewing the 4 x 12mm bolts around the retainer.
The old retainer might be stuck down from the old gasket material. Use the plastic hammer and whack the side of it a couple of times carefully and it should break free. You might want to put a towel to cover the opening. You don't want anything to fall inside the transmission.
Don't use a rubber mallet because it doesn't work.
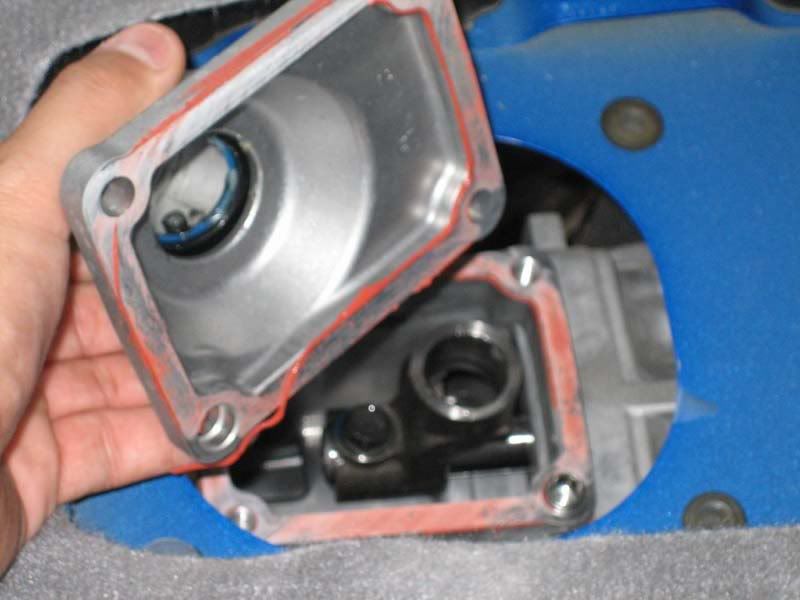
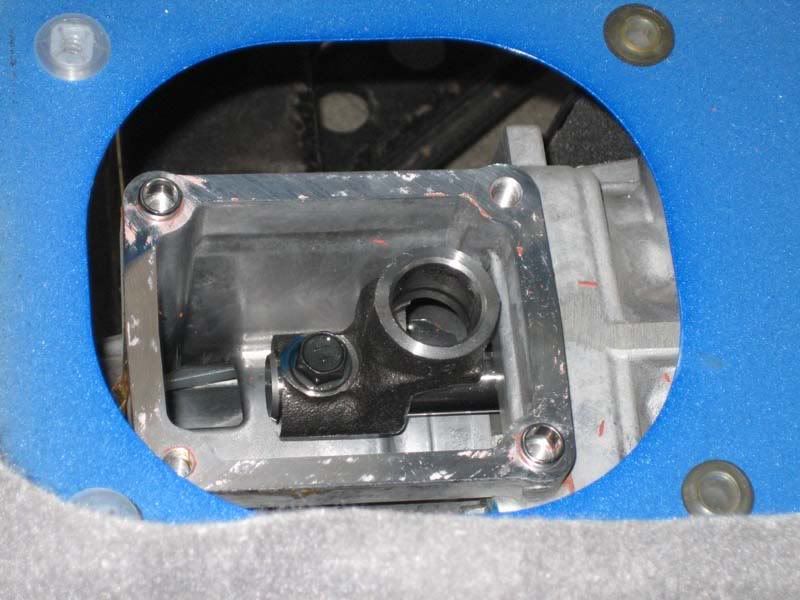
Step 8: Remove the old gasket material (stuff a clean shop rag into the opening so the gasket material doesn't fall in) from both the transmission and the bottom of the shifter retainer. I used a plastic scraper to get all the large stuff off and some rubbing alcohol to remove the rest. This is probably the most time consuming part of the installation, it took me about 30 minutes to get all the crap off. The after picture still has a little gasket material but I removed all of it. I just got a little frustrated and wanted to get the picture out of the way. D
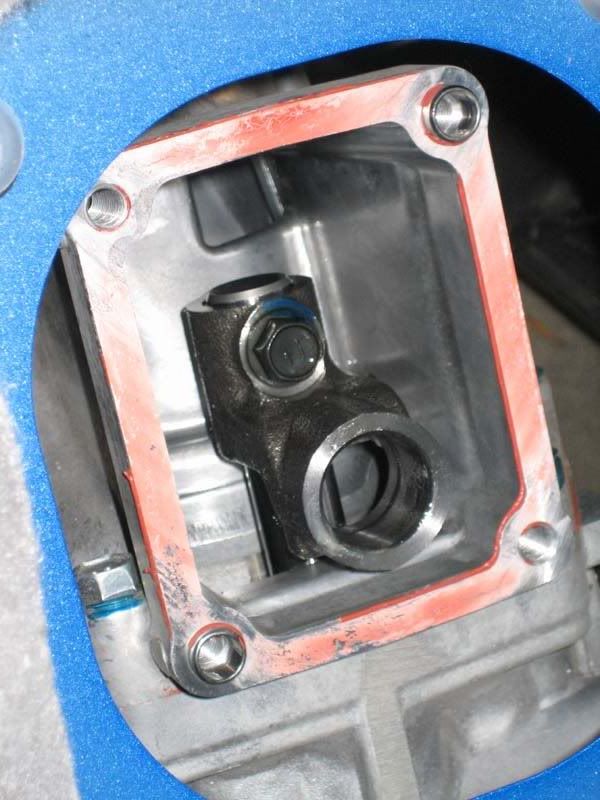
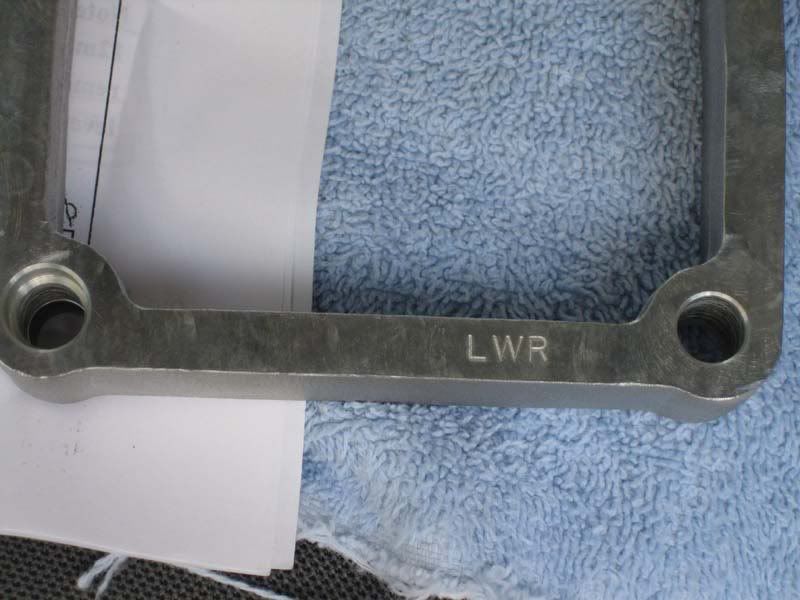
Step 9: Apply the new gasket sealant to the bottom part of the spacer and install. The new spacer is stamped LWR for the bottom. I went a little overboard with the new gasket material and I had to wipe off the excess that seeped out. The spacer has two holes with counter bores on them, make sure to line them up properly when installing.

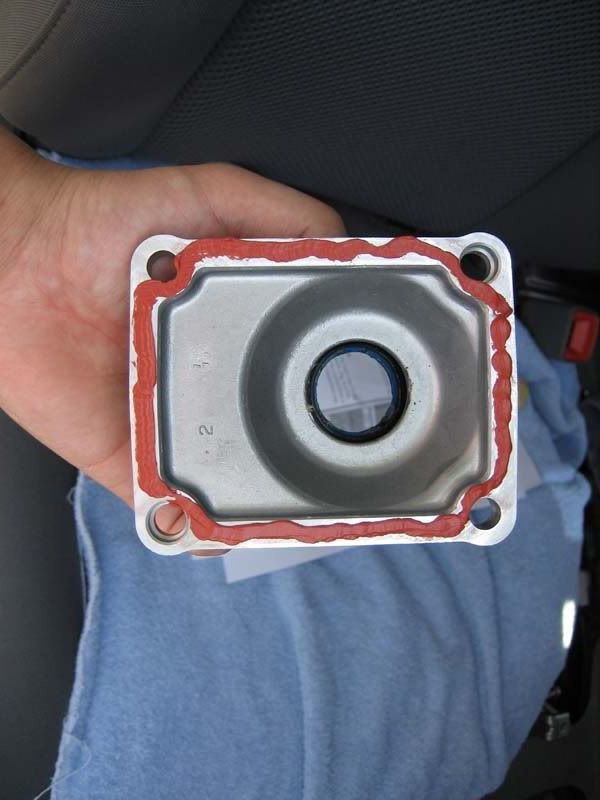
Step 10: Apply the new gasket sealer to the bottom of the shift retainer and install
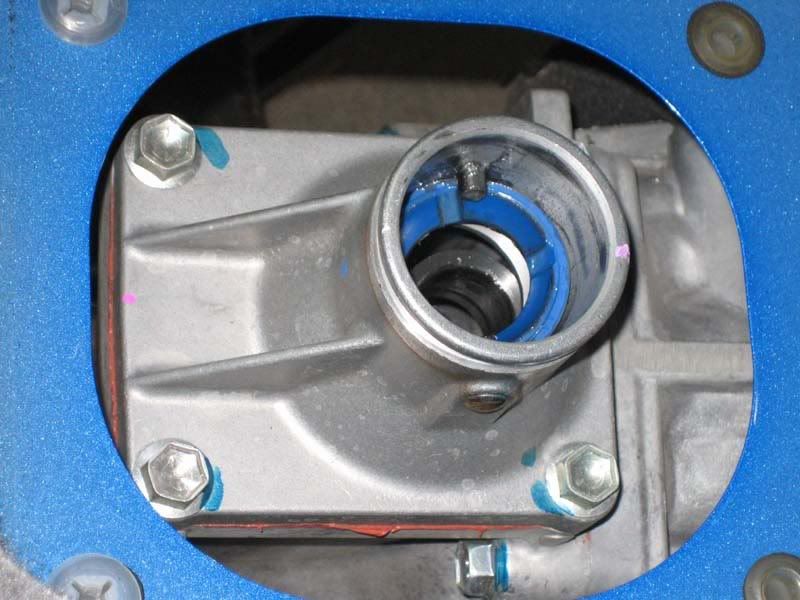
Step 11: Install the new bolts supplied with the shift kit (they are longer than the old ones). Hand thread them until they seat properly to avoid stripping or cross threading. Use your torque wrench and apply 25lb/ft. You should evenly torque them down in a X pattern before applying the full 25lb/ft
I had to use a 12mm 1/2" drive with my torque wrench.
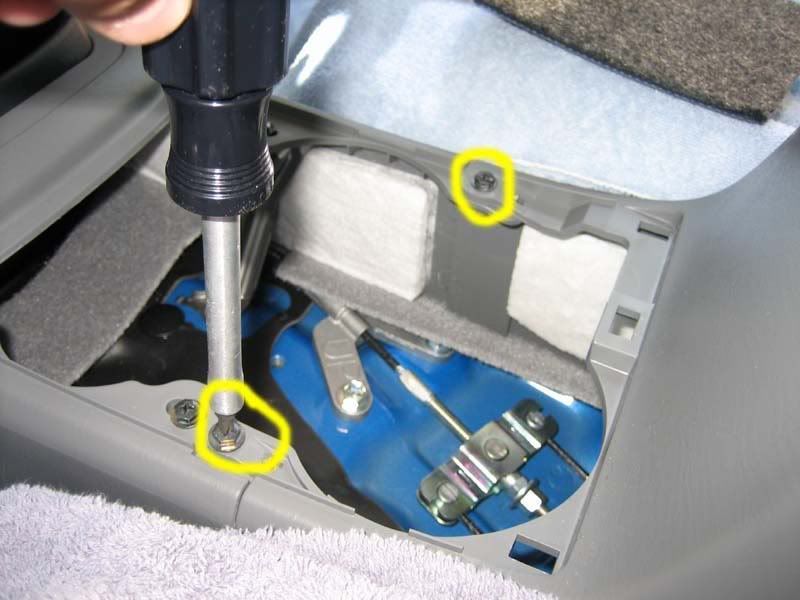
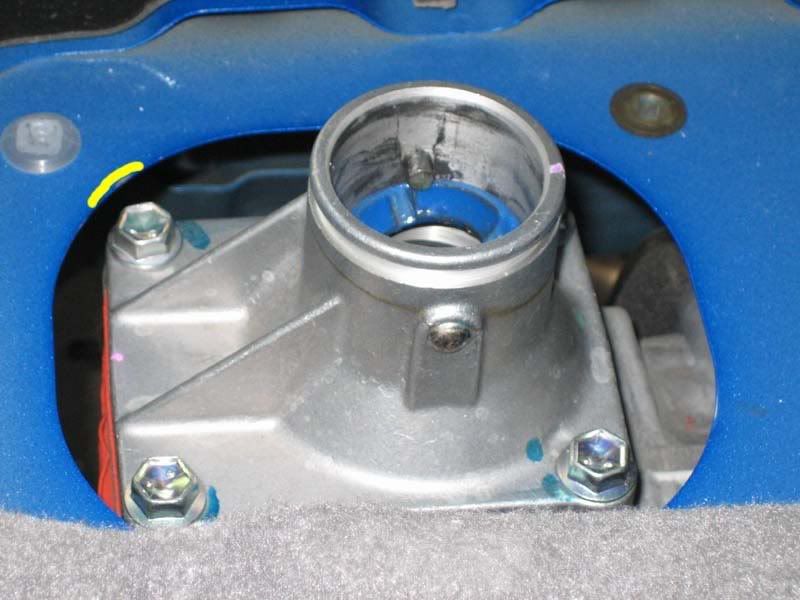
With the new spacer installed you might not have enough clearence to put a socket over one bolt (upper left bolt in the picture). You can either Use a Dremel tool with the drum sander bit and grind down some of the metal so you can make clearence for a socket. You don't need to grind a lot just enough to make enough room for a socket.
or you can use a open end wrench to torque down the bolt.
I ended up sanding down a little bit of the metal to make clearence. Trim the area marked in yellow
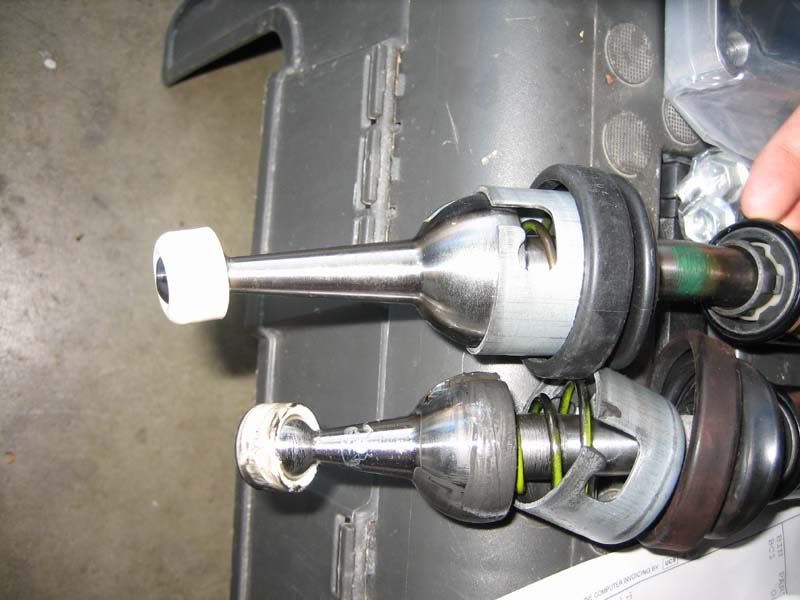
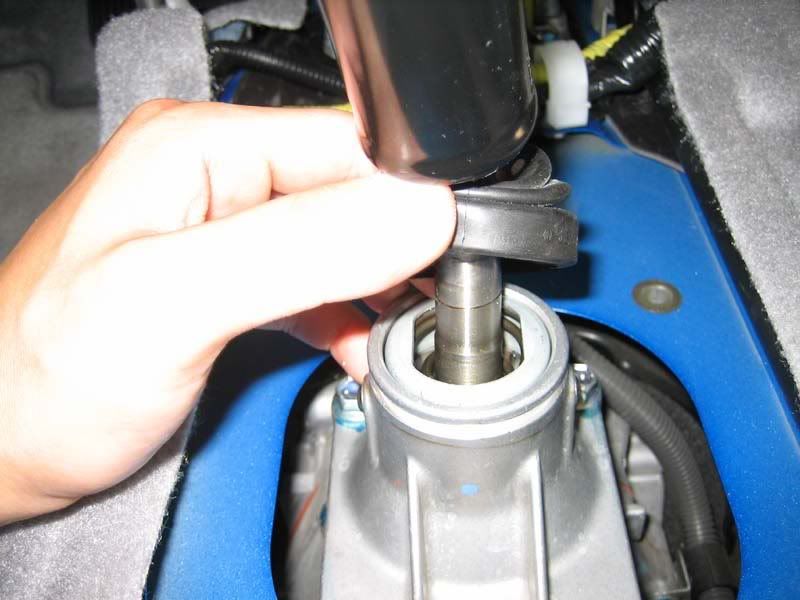
Step 12: Install the new TRD Short Shifter in the opposite fashion as you removed the old shifter. There are two key index marks on the inside of the shift retainer (you must line up the two key index marks on the shift lever cap with the marks on the ball on the shifter) and two on the side of the shifter.
Align your markers up and it should slide into place. Now you can press down on the shift lever cap and turn it clockwise until it locks into place.
Put the dust cover over the base of the shift lever retainer
Put your shift knob back on before re-assembling everything. If you installed everything properly you should be able to shift into all the gears properly. Putting into reverse is a lot harder than before but it should still go in without too much force.
Install the center console in the reverse order and go drive that sucker around the block!
This installation was done on a 2007 Tacoma X-Runner 6 Speed. These instructions may or may not work on a 4x4 or 5 speed model. Additional parts & tools may be required for 4wd or Pre-runner
Installation Time
45 minutes - 90 minutes
Difficulty
5 out of 10
Tools Needed
12mm 3/8 drive socket
12mm 1/2 drive socket
10mm 3/8 drive Socket
12mm Combo wrench
3/8" Ratchet
3/8" Ratchet extension
Torque wrench
Assorted philips & flathead screwdrivers
Plastic Hammer
Rubbing Alcohol
RTV Silicon or Toyota FIPG Sealant (P/N 00295-01281)
TRD Quickshifter 2wd P/N PTR04-35051 ($287.50 @ TRDParts4u.com)
Kit's Contents
1 Short Shifter
1 Spacer
4 Bolts
Installation Instructions
Toyota's Form In Place Gasket - P/N 00295-01281
Cost $23 from Puente Hills Toyota. It just gives me piece of mind knowing the materials I used are correct.
Step 1: Cover up your seats & floors with an old Towel to keep any grease or oil off your fabric incase you drop something
Step 2: Remove the center consoles cup holder by lifting it straight up, you don't need to pry it with a screwdriver. There are a few clips that secure the cup holders down. Just be patient when you remove it to prevent breaking any clips. Mine came off fairly easily.
Step 3: Remove the center console compartment.
Open the lid and remove the carpet. Use a small screw drive to pry up a corner of the carpet and lift up.
Under the carpet are 2 x 10mm Bolts , remove them and store .
Where the cup holder was there are 2 philips head screws, remove and store.
Remove the center console compartment by lifting up. There are a couple of hooks that secure it (you can partially see them in the picture). It comes off easily so don't force it off.
Step 4: Remove the center console.
Drop the shifter into 2nd, 4th, or 6th gear and remove shift knob.
Remove the two screws that are located under where the cupholder was.
Pull the center console back towards the rear of the cab and lift up at the sametime. There are 3 clips total holding the console. They should come off easily again don't force just use a little patients.
Step 5: remove your shifter's dust boot by unscrewing the two philips head screws on the side closer to the center console compartment (located on the bottom of the picture). There are two clips that are holding down the front. Use a small screw driver and push the center down and it will disengage the clip. Lift up and remove. Store all hardware in safe place.
Step 6: Lift up the rubber dust boot to expose the shift lever cap
Next unscrew the shift lever cap by pressing down on the center part and turning it counter clockwise. It should just pop off. You can remove and store your old shifter.
Step 7: Remove the shift lever retainer by unscrewing the 4 x 12mm bolts around the retainer.
The old retainer might be stuck down from the old gasket material. Use the plastic hammer and whack the side of it a couple of times carefully and it should break free. You might want to put a towel to cover the opening. You don't want anything to fall inside the transmission.
Don't use a rubber mallet because it doesn't work.
Step 8: Remove the old gasket material (stuff a clean shop rag into the opening so the gasket material doesn't fall in) from both the transmission and the bottom of the shifter retainer. I used a plastic scraper to get all the large stuff off and some rubbing alcohol to remove the rest. This is probably the most time consuming part of the installation, it took me about 30 minutes to get all the crap off. The after picture still has a little gasket material but I removed all of it. I just got a little frustrated and wanted to get the picture out of the way. D
Step 9: Apply the new gasket sealant to the bottom part of the spacer and install. The new spacer is stamped LWR for the bottom. I went a little overboard with the new gasket material and I had to wipe off the excess that seeped out. The spacer has two holes with counter bores on them, make sure to line them up properly when installing.
Step 10: Apply the new gasket sealer to the bottom of the shift retainer and install
Step 11: Install the new bolts supplied with the shift kit (they are longer than the old ones). Hand thread them until they seat properly to avoid stripping or cross threading. Use your torque wrench and apply 25lb/ft. You should evenly torque them down in a X pattern before applying the full 25lb/ft
I had to use a 12mm 1/2" drive with my torque wrench.
With the new spacer installed you might not have enough clearence to put a socket over one bolt (upper left bolt in the picture). You can either Use a Dremel tool with the drum sander bit and grind down some of the metal so you can make clearence for a socket. You don't need to grind a lot just enough to make enough room for a socket.
or you can use a open end wrench to torque down the bolt.
I ended up sanding down a little bit of the metal to make clearence. Trim the area marked in yellow
Step 12: Install the new TRD Short Shifter in the opposite fashion as you removed the old shifter. There are two key index marks on the inside of the shift retainer (you must line up the two key index marks on the shift lever cap with the marks on the ball on the shifter) and two on the side of the shifter.
Align your markers up and it should slide into place. Now you can press down on the shift lever cap and turn it clockwise until it locks into place.
Put the dust cover over the base of the shift lever retainer
Put your shift knob back on before re-assembling everything. If you installed everything properly you should be able to shift into all the gears properly. Putting into reverse is a lot harder than before but it should still go in without too much force.
Install the center console in the reverse order and go drive that sucker around the block!
Last edited: