trd_sport
Active Member
- Joined
- Feb 18, 2007
- Messages
- 6,563
- Reaction score
- 1
The Doug Thorley Longtube Headers are a simple bolt-up design. By following these directions a novice should be able to install these in 2-3hours. I have included some pictures to help you know what you're looking for.
1.) Start by disconnecting your battery.
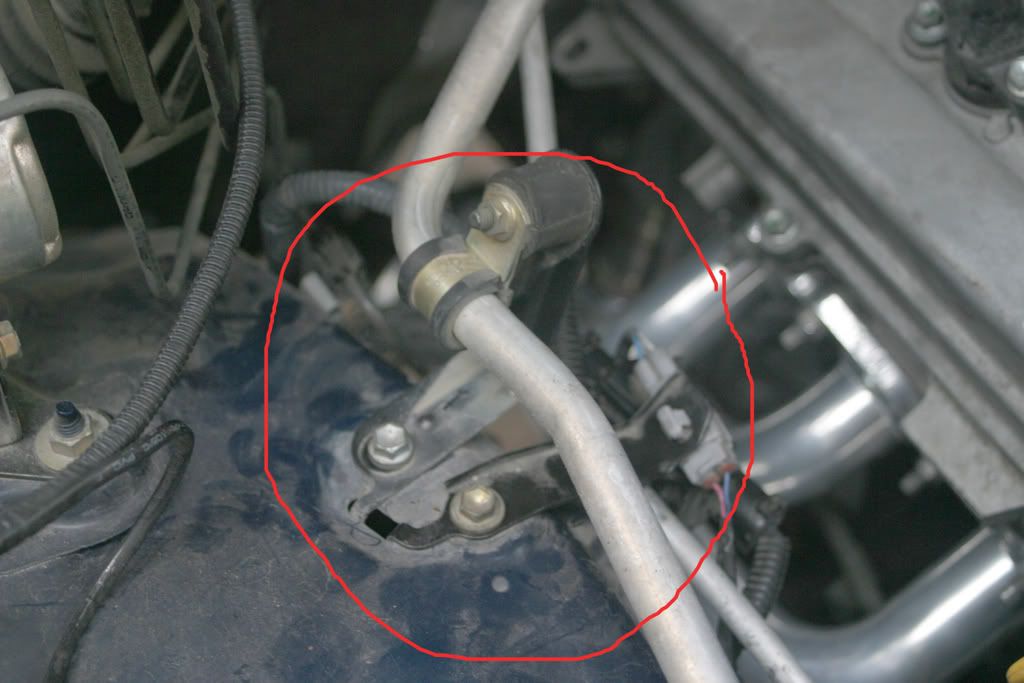
2.) Remove the passenger side a/c lines and brackets pictured here.(Note: you do not have to remove thes entirely from the engine bay, simply disconnect them from the brackets so they can be pulled out of the way.)
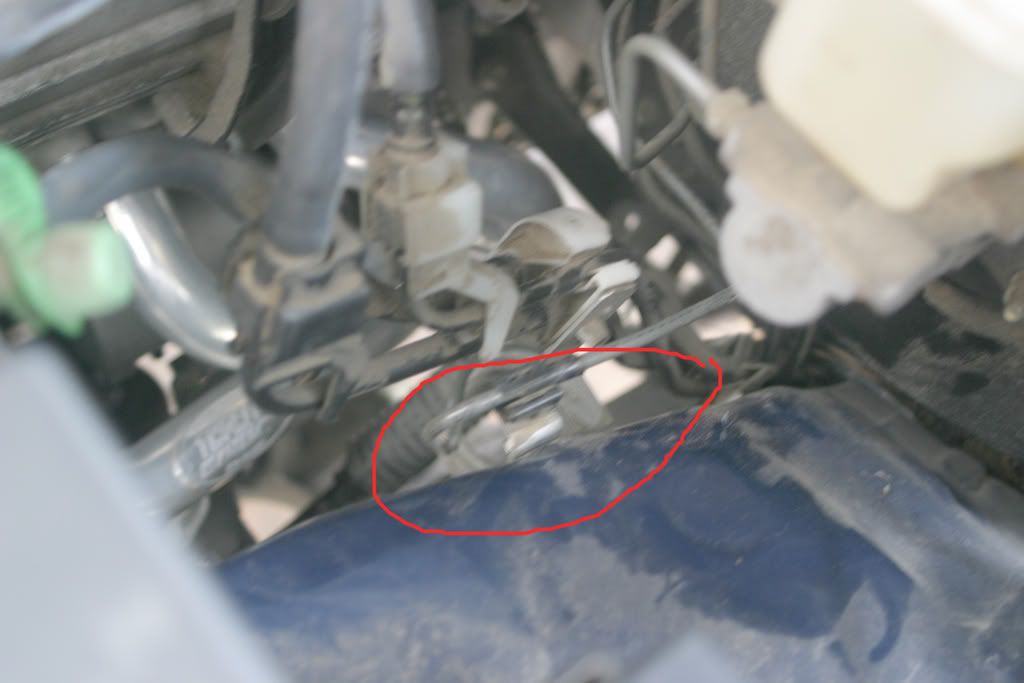
3.) Remove these 2 brackets on the drivers side so these lines can be pulled out of the way also.(Note: you should not have to remove or unplug any of these lines)
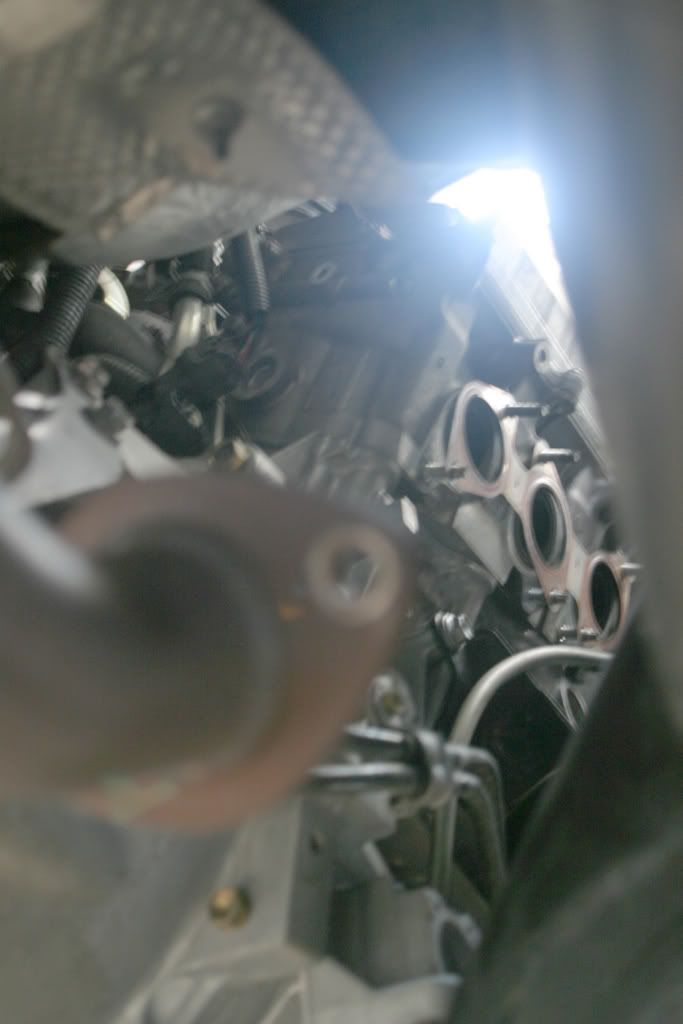
4.) Unclip the sensors from the harness pictured here.( push in on the tab on the left of the harness and pull apart. You can access the harness from the top or bottom of vehicle. I found it easiest to unplug the driver side harness from under the vehicle and the passenger side harness from the top)

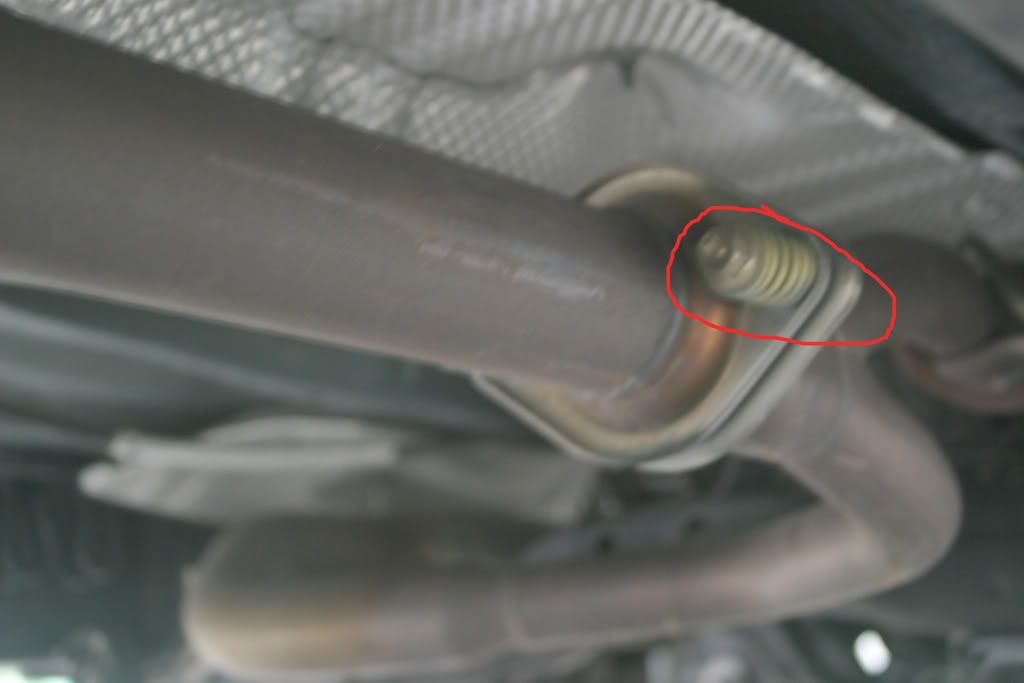
5.)Now, loosen the spring loaded y-pipe bolts as much as possible.(I did not remove them completely, just enough so you can push the y-pipe down and out of the way later.)14mm bolts.
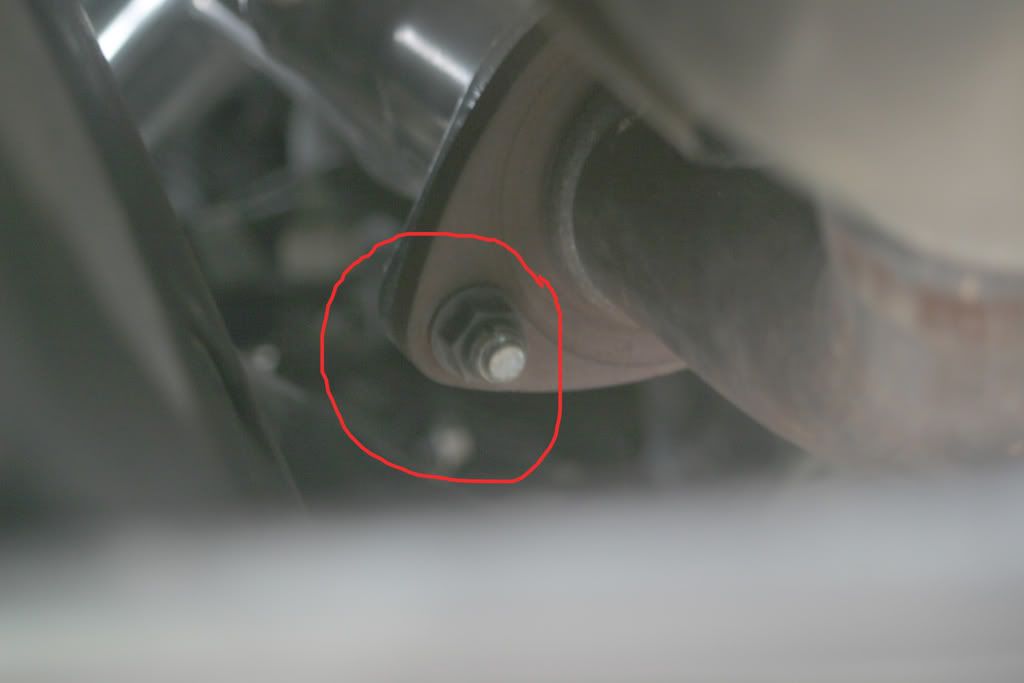
6.) For the collector flange nuts(14mm) I would recommend using an impact if they are too tight to loosen with a hand ratchet, you do not want to strip any of these. Also, remove the bracket bolt on the flange.(14mm)
7.)For the manifold head nuts, be patient and feel around. I was able to access the top 3 bolts and the bottom bolt closest to the front of the vehicle from the top of the vehicle using a 12mm extension. The bottom 2 bolts may be easier to access from the bottom however, they can be accessed from the top with patience.
8.) Now that you have all these bolts off and sensor harnesses unplugged, pull the manifolds off the vehicle. It may take a bit of manuvering and jiggling to get it all off. I found the easiest way was to access them from under the vehicle and let them drop down.( Be very careful not to catch the sensor wires on anything)
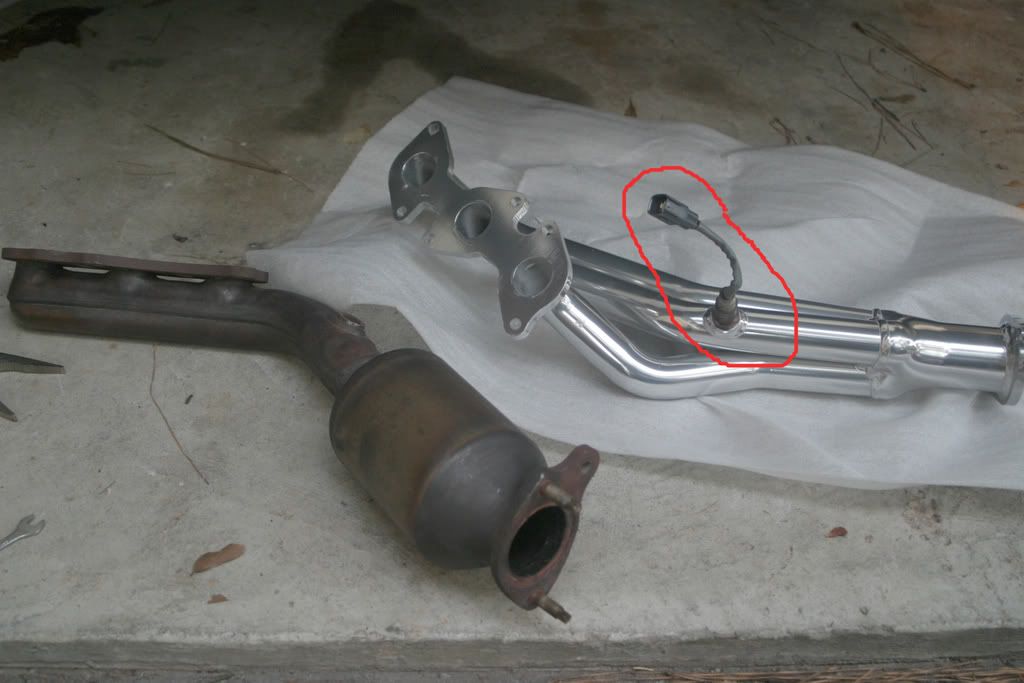
9.) Now that you have the stock manifolds off the vehicle transplant the sensors into the new headers. I used a channel lock to remove the sensors, box end is recomended though .(you can use a non-silicone based antiseize on the sensor threads)
10) Longtube installation:
Before you begin to install the new headers make sure you have the gaskets in place. ( I reused the stock gaskets and have not had a problem with leaks, but some say to use new ones)
11.) Drop in the new headers from the top of the vehicle.(This is where the removal of brackets in step 2 & 3 is needed) Have a buddy under the vehicle help lineup the collector flange and bracket if you need. They drop in pretty easy. Once they are in, hand tighten the manifold head nuts. Repeat for other side.
12.)Line Up all bolts at the collector flange and hand tighten those.
13.) Start to torque the nuts on the head bolts from the inside and work your way out. Next torque the nuts at the collector flange. Now, torwue down the spring loaded bolts at the y-pipe until everything is tight.( Note: Torque nuts and bolts in this order so you dont load up the collector flange.)
14.) Reattach the sensor harnesses and the brackets removed in step 2 & 3.
Note: X-runner models only--there is a bracket with wires that needs to bent away from the headers to avoid heat damage to the wires.
15.) Reconnect battery and start her up:top:
note: re-torque bolts after 20 minutes of operation.
1.) Start by disconnecting your battery.
2.) Remove the passenger side a/c lines and brackets pictured here.(Note: you do not have to remove thes entirely from the engine bay, simply disconnect them from the brackets so they can be pulled out of the way.)
3.) Remove these 2 brackets on the drivers side so these lines can be pulled out of the way also.(Note: you should not have to remove or unplug any of these lines)
4.) Unclip the sensors from the harness pictured here.( push in on the tab on the left of the harness and pull apart. You can access the harness from the top or bottom of vehicle. I found it easiest to unplug the driver side harness from under the vehicle and the passenger side harness from the top)
5.)Now, loosen the spring loaded y-pipe bolts as much as possible.(I did not remove them completely, just enough so you can push the y-pipe down and out of the way later.)14mm bolts.
6.) For the collector flange nuts(14mm) I would recommend using an impact if they are too tight to loosen with a hand ratchet, you do not want to strip any of these. Also, remove the bracket bolt on the flange.(14mm)
7.)For the manifold head nuts, be patient and feel around. I was able to access the top 3 bolts and the bottom bolt closest to the front of the vehicle from the top of the vehicle using a 12mm extension. The bottom 2 bolts may be easier to access from the bottom however, they can be accessed from the top with patience.
8.) Now that you have all these bolts off and sensor harnesses unplugged, pull the manifolds off the vehicle. It may take a bit of manuvering and jiggling to get it all off. I found the easiest way was to access them from under the vehicle and let them drop down.( Be very careful not to catch the sensor wires on anything)
9.) Now that you have the stock manifolds off the vehicle transplant the sensors into the new headers. I used a channel lock to remove the sensors, box end is recomended though .(you can use a non-silicone based antiseize on the sensor threads)
10) Longtube installation:
Before you begin to install the new headers make sure you have the gaskets in place. ( I reused the stock gaskets and have not had a problem with leaks, but some say to use new ones)
11.) Drop in the new headers from the top of the vehicle.(This is where the removal of brackets in step 2 & 3 is needed) Have a buddy under the vehicle help lineup the collector flange and bracket if you need. They drop in pretty easy. Once they are in, hand tighten the manifold head nuts. Repeat for other side.
12.)Line Up all bolts at the collector flange and hand tighten those.
13.) Start to torque the nuts on the head bolts from the inside and work your way out. Next torque the nuts at the collector flange. Now, torwue down the spring loaded bolts at the y-pipe until everything is tight.( Note: Torque nuts and bolts in this order so you dont load up the collector flange.)
14.) Reattach the sensor harnesses and the brackets removed in step 2 & 3.
Note: X-runner models only--there is a bracket with wires that needs to bent away from the headers to avoid heat damage to the wires.
15.) Reconnect battery and start her up:top:
note: re-torque bolts after 20 minutes of operation.
Last edited: